Contents
- 1 Why You’ll Love These Oreo Cupcakes
- 2 Ingredients You’ll Need
- 3 Essential Equipment for Oreo Cupcakes
- 4 Step-by-Step Guide to Making the Best Oreo Cupcakes
- 4.1 Step 1: Prep Like a Pro
- 4.2 Step 2: Mix the Dry Ingredients
- 4.3 Step 3: How to Perfectly Mix Wet Ingredients for a Smooth and Fluffy Batter
- 4.4 Step 4: Add the Egg Whites
- 4.5 Step 5: Bring It All Together
- 4.6 Step 6: Easy Way to Use Crushed Oreos for a Dessert That’s Both Smooth and Crunchy
- 4.7 Step 7: Perfectly Filling and Baking Your Oreo Dessert for a Rich and Creamy Treat
- 4.8 Step 8: Cool Completely
- 4.9 Step 9: Frost Like a Pro
- 5 Cooking Tips for the Perfect Oreo Cupcakes
- 6 A Delicious Flashback: What Makes These Oreo Cupcakes Unforgettable
- 7 Nutritional Breakdown of Oreo Cupcakes
- 8 Cooking Time & Yield for Oreo Cupcakes
- 9 Frequently Asked Questions
- 9.1 1. Can I substitute sour cream in this Oreo Cupcakes recipe?
- 9.2 2. How do I store leftover Oreo Cupcakes?
- 9.3 3. Can I freeze these cupcakes?
- 9.4 4. How can I make the frosting extra smooth?
- 9.5 5. Can I use a different type of Oreo?
- 9.6 6. How should I break down Oreos to mix into the batter and frosting?
- 9.7 7. Is it possible to bake these as bite-sized Oreo cupcakes instead of the standard size?
Why You’ll Love These Oreo Cupcakes
Imagine biting into a soft, fluffy cupcake that tastes like the best part of an Oreo—rich chocolatey crunch meets smooth vanilla sweetness, all wrapped up in a handheld treat. Whether you’re baking for a birthday party, a family treat, or just because your sweet tooth demands it, this Oreo Cupcakes recipe is your new best friend.
And the best part? Anyone can make this dessert—it’s easier than it looks and requires no special skills. With simple ingredients and an easy process, these Oreo cupcakes are perfect for busy moms, professionals, or anyone craving a little cookies-and-cream magic.
Ingredients You’ll Need
For the Oreo Cupcakes:
- 1 ½ cups (188 g) all-purpose flour – The base of every great cupcake, giving it structure and softness.
- ¾ cup (150 g) granulated sugar – Just the right amount of sweetness to balance the Oreo flavor.
- 1 teaspoon baking powder – Helps your Oreo cupcakes rise to fluffy perfection.
- ⅛ teaspoon baking soda – A little boost for extra fluffiness.
- ½ teaspoon salt – Enhances all the flavors and keeps the sweetness from overpowering.
- 6 Tablespoons avocado oil (or vegetable/canola oil) – Keeps the Oreo cupcakes moist and tender.
- ⅓ cup (80 g) sour cream – Adds richness and a slight tang for depth of flavor.
- ½ Tablespoon clear vanilla extract – For that classic vanilla cupcake essence.
- ⅓ cup whole milk (room temperature preferred) – Ensures a smooth batter and moist cupcakes.
- 3 large egg whites (room temperature preferred) – Gives the cupcakes their light, airy texture.
- 8 Oreos, broken into pieces – The star ingredient, adding crunch and classic Oreo goodness.
For the Frosting:
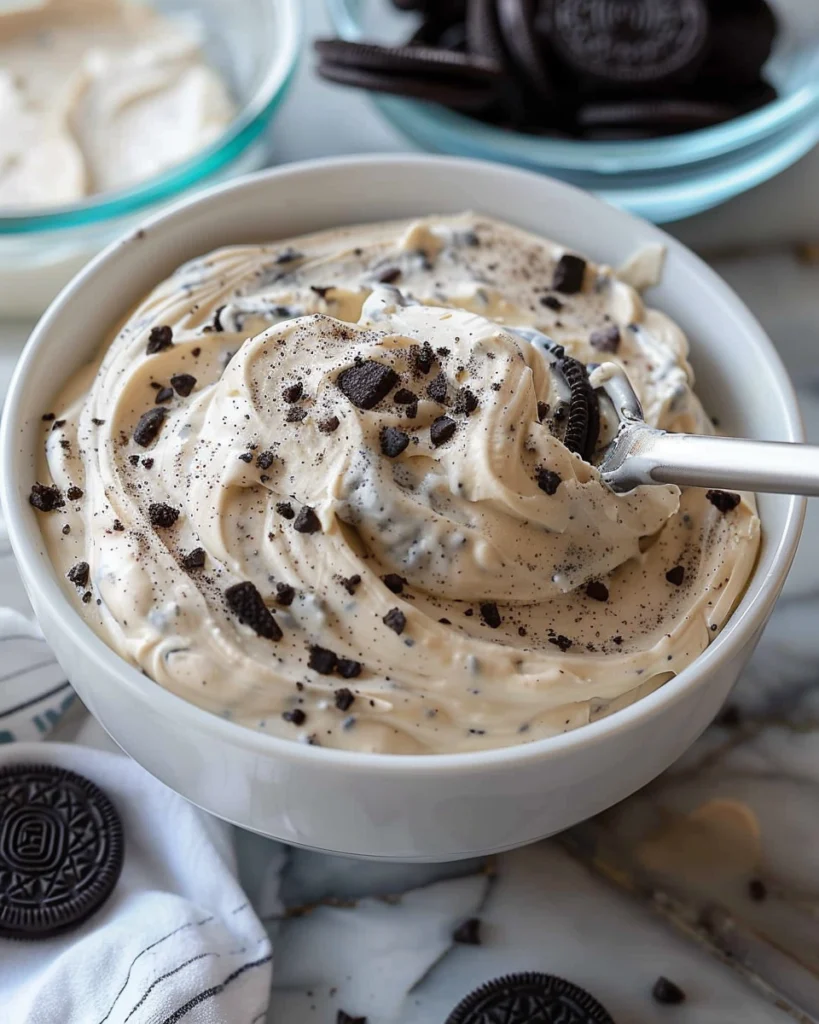
- 1 batch cream cheese frosting – Click here for the best homemade frosting recipe.
- 6 Oreo cookies, finely crushed – Because more Oreos are always a good idea!
Essential Equipment for Oreo Cupcakes
Before you dive into baking, make sure you have everything you need on hand. Here’s what you’ll need:
- You will need separate large containers — one specifically designated for combining all the powdered or granulated components, and another dedicated to blending the liquid-based elements to ensure proper consistency before integrating them together.
- Electric mixer or whisk – A hand or stand mixer will make your life easier, but a whisk and some elbow grease work too!
- When preparing baked goods – it is essential to utilize specialized tools designed for accurately portioning both liquid and dry ingredients, as even the slightest variation in quantity can significantly impact the final texture, flavor, and overall success of the recipe.
- Cupcake liners – Keeps everything neat and makes serving a breeze.
- Muffin tin – Holds the Oreo cupcakes while they bake to perfection.
- Spatula – For scraping every last bit of batter and frosting.
- Cooling rack – Helps cool the cupcakes evenly before frosting.
- Piping bag & tips (optional) – For fancy frosting swirls, but a simple spoon works just fine!
Step-by-Step Guide to Making the Best Oreo Cupcakes
Step 1: Prep Like a Pro
Before beginning the baking process, set your oven to a temperature of 350°F (175°C) to allow it to reach the optimal heat level, ensuring even cooking. At the same time, prepare a standard muffin tray that holds twelve portions by carefully placing individual paper liners into each cavity, which will help prevent sticking and make for easy removal after baking. If you’re feeling fancy, lightly spritz the liners with a little non-stick spray for an even easier release.
Step 2: Mix the Dry Ingredients
Take a spacious container suitable for mixing and carefully combine the all-purpose flour with leavening agents, including both baking powder and baking soda, along with a measured amount of salt.
Use a whisk to gently aerate the mixture, ensuring all the dry components are evenly distributed for a consistent texture in the final baked creation. Set it aside—this will be your cupcake’s foundation.
Step 3: How to Perfectly Mix Wet Ingredients for a Smooth and Fluffy Batter
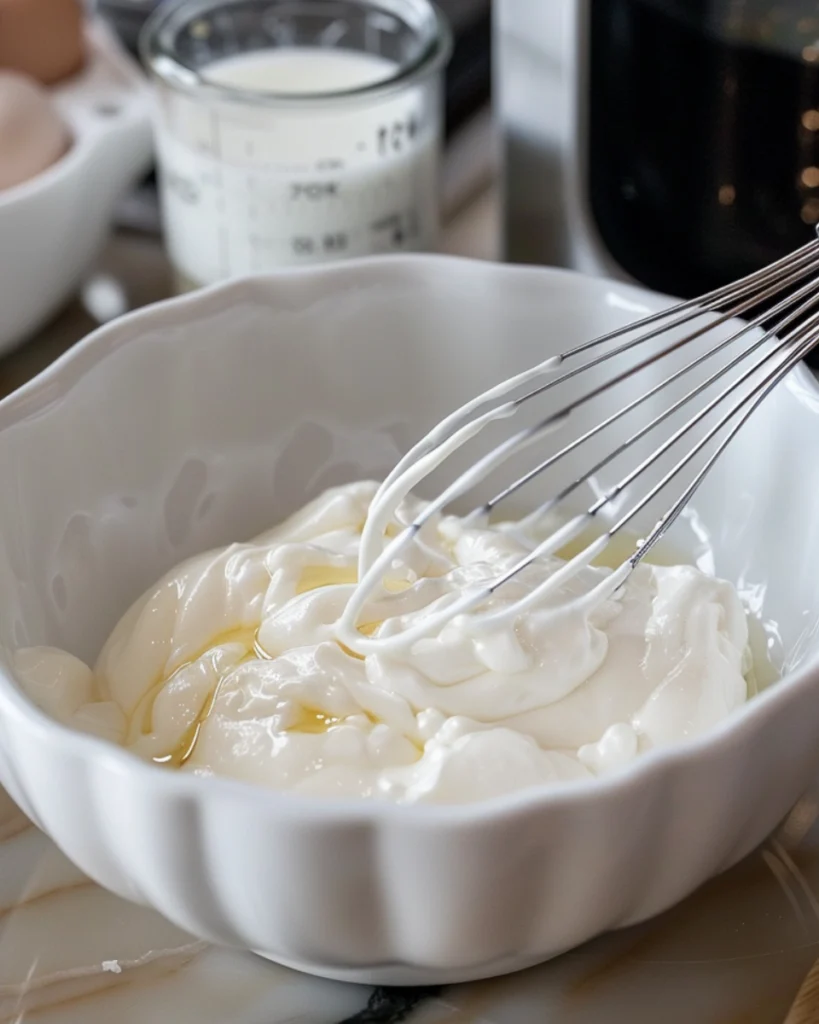
In another bowl, whisk the sugar, oil, sour cream, vanilla extract, and milk until smooth. It should look creamy and well combined.
Keep an eye on the oven for a golden, slightly firm top—your ultimate Oreo dessert is almost ready to enjoy! And if you’re a fan of classic vanilla flavors, don’t miss these Gluten-Free Vanilla Cupcakes
Step 4: Add the Egg Whites
Slowly mix in the egg whites, one at a time, stirring gently until fully incorporated. This step ensures light and airy Oreo cupcakes.
Step 5: Bring It All Together
Slowly mix the dry ingredients into the wet ones, gently stirring only until everything comes together. Overmixing will make your Oreo cupcakes dense, and we want them light and fluffy!
Step 6: Easy Way to Use Crushed Oreos for a Dessert That’s Both Smooth and Crunchy
Gently fold in the Oreo pieces, distributing them evenly through the batter. Each bite should have a perfect cookies-and-cream balance.
For another irresistibly rich and creamy cupcake experience, check out this Hostess Cupcakes Recipe
Step 7: Perfectly Filling and Baking Your Oreo Dessert for a Rich and Creamy Treat
If you love indulgent chocolate treats, you might also enjoy this Gluten-Free Chocolate Cupcakes Recipe
Scoop the batter into the prepared muffin tin, filling each liner about ⅔ full. Place the prepared batter into the preheated oven and allow it to cook for approximately 18 to 20 minutes, keeping a close eye on the progress.
Check if it’s done by gently pushing a toothpick into the middle—if it comes out clean without sticky batter, it’s ready and nicely baked through, check this many baked recipes for long weekend.
Step 8: Cool Completely
Allow the Oreo cupcakes to rest in the pan for about 5 minutes before moving them to a wire rack to cool completely. Patience is key—warm cupcakes + frosting = disaster!
Step 9: Frost Like a Pro
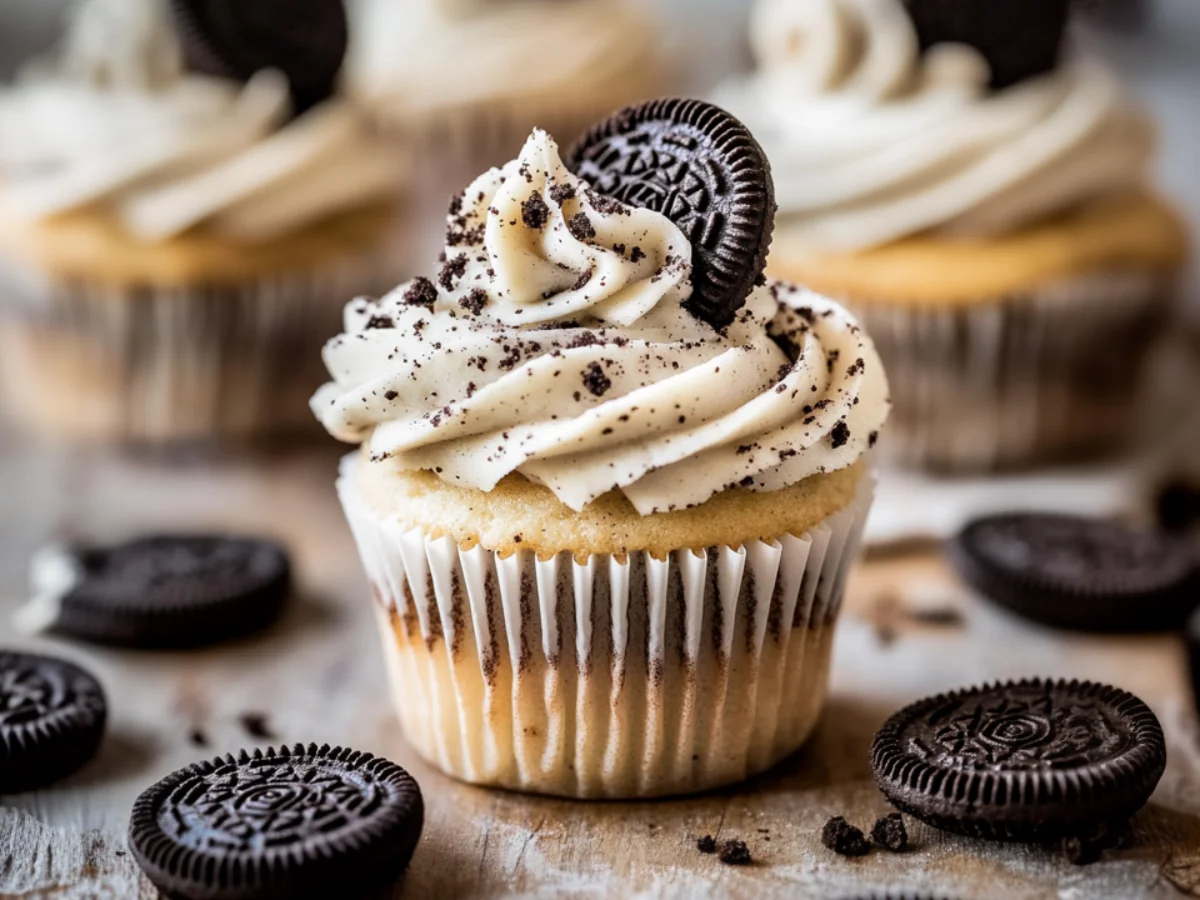
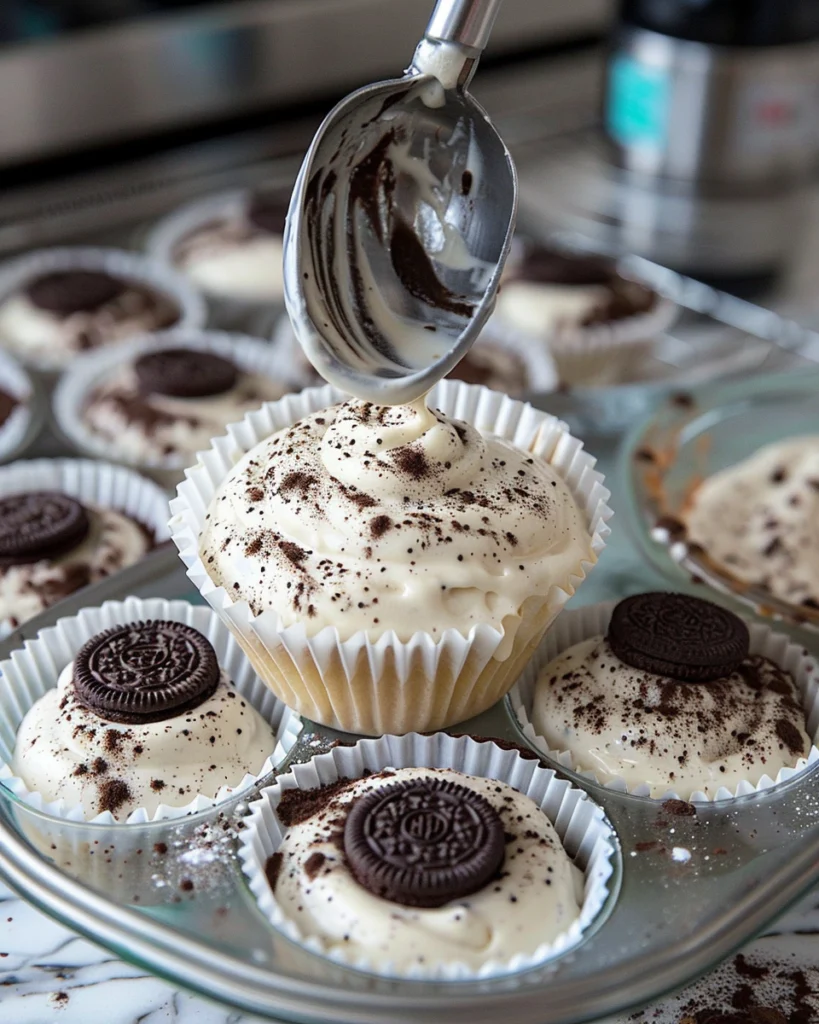
Once your Oreo cupcakes are cool, pipe or spread on the cream cheese frosting, then sprinkle with finely crushed Oreos for the perfect finishing touch.
Cooking Tips for the Perfect Oreo Cupcakes
- Room Temp Ingredients = Bakery-Level Cupcakes
Baking is all about science! Using room-temperature eggs and milk helps create a smooth batter and a fluffier cupcake. - Crush Oreos, Don’t Pulverize Them
Larger pieces tend to drop to the bottom, but finely crushed bits mix smoothly throughout the batter. Aim for a mix of both! - Don’t Overmix the Batter
Overmixing leads to dense, chewy cupcakes. Stir until just combined—lumps are okay! - Use an Ice Cream Scoop for Even Cupcakes
This trick ensures each cupcake is the same size, which means even baking. - Let the Oreo Cupcakes Cool Before Frosting
I know it’s hard to wait, but frosting melts on warm cupcakes, turning your masterpiece into a sticky mess. - Boost the Oreo Flavor
If you’re a true Oreo lover, add crushed Oreos to the frosting for even more cookies-and-cream goodness.
Got extras? Keep them fresh by sealing them in a container with a tight-fitting lid. Need more ideas on saving sweet leftovers? Take a look at our handy storage guide.
A Delicious Flashback: What Makes These Oreo Cupcakes Unforgettable
The first time I baked these Oreo cupcakes was for my niece’s birthday bash—and they were gone in a flash! Every bite packed with cookie pieces had the kids grinning, and the grown-ups? Well, they were more than happy to take care of the “extras.”
These days, it’s a must-have at all our family gatherings—everyone keeps asking for it. There’s just something about the mix of nostalgia and homemade sweetness that brings people together—one bite at a time!
Nutritional Breakdown of Oreo Cupcakes
If you’re wondering whether these Oreo Cupcakes are worth every bite—spoiler alert: they totally are! While they might not be an everyday health food, they strike the perfect balance between indulgence and homemade goodness. Each cupcake is packed with just the right amount of sweetness, a touch of richness from the cream cheese frosting, and, of course, those irresistible Oreo cookie crumbles.
Key Nutritional Information
- Calories: Each cupcake delivers a satisfying energy boost, making it perfect for a mid-day treat or dessert.
- Fats: Using avocado or vegetable oil together with cream cheese frosting helps create a rich, tender texture and adds to the recipe’s creamy richness.
- Carbohydrates & Sugar: The flour, sugar, and Oreos provide quick energy, so these Oreo cupcakes are best enjoyed in moderation.
- Protein: While not protein-heavy, the egg whites add some structure and a small protein boost.
- Calcium & Iron: Thanks to the milk and Oreos, these Oreo cupcakes offer a slight nutritional bonus.
- Sodium: Present in moderate amounts, so be mindful if watching salt intake.
Nutrition Facts Per Serving (1 Cupcake with Frosting)
| Nutrient | Amount per Serving |
|---|---|
| Serving Size | 1 cupcake |
| Calories | ~280 kcal |
| Total Fat | 13 g |
| Saturated Fat | 4.5 g |
| Unsaturated Fat | 7.5 g |
| Trans Fat | 0 g |
| Cholesterol | 20 mg |
| Sodium | 180 mg |
| Total Carbohydrates | 37 g |
| Dietary Fiber | 0.8 g |
| Total Sugar | 24 g |
| Protein | 3.5 g |
| Calcium | 45 mg (4% DV) |
| Iron | 1 mg (5% DV) |
| Potassium | 75 mg (2% DV) |
While these cupcakes are undeniably a sweet treat, they’re also a delightful way to indulge in moderation.
Cooking Time & Yield for Oreo Cupcakes
Making these Oreo Cupcakes is a breeze, and knowing the exact time breakdown helps you plan ahead. Whether you’re baking for a special occasion or just treating yourself, here’s how long each step will take:
Cooking Time Breakdown
| Step | Time Required |
|---|---|
| Prep Time | 15 minutes |
| Cook Time | 18-20 minutes |
| Chilling Time (for frosting, if needed) | 15-20 minutes |
| Total Time | ~50 minutes |
Yield
- 12 standard cupcakes (can be adjusted for mini or jumbo sizes)
- Serving Size: 1 cupcake
Cuisine
- American – A classic cookies-and-cream-inspired dessert, perfect for sweet lovers everywhere!
There’s something undeniably comforting about the combination of soft, fluffy cake and the unmistakable crunch of Oreos. Whether you’re making these Oreo Cupcakes for a birthday, a bake sale, or just because your sweet tooth demands it, they never fail to impress. Every bite is a delightful balance of rich vanilla, creamy frosting, and that signature cookies-and-cream goodness that keeps everyone coming back for more.
Baking at home isn’t just about satisfying cravings—it’s about the joy of creating something special with simple ingredients and a little love. These Oreo cupcakes are easy enough for a weekday treat yet fancy enough for a celebration, making them a go-to recipe for any occasion. Plus, there’s just something magical about the way Oreos transform a simple cupcake into an indulgent dessert that feels nostalgic and exciting all at once.
So the next time you’re in need of a no-fuss, crowd-pleasing dessert, remember this Oreo Cupcakes recipe. They’re the kind of treat that turns an ordinary day into something a little sweeter, one delicious bite at a time.
Frequently Asked Questions
1. Can I substitute sour cream in this Oreo Cupcakes recipe?
Yes! If you don’t have sour cream, you can use plain Greek yogurt or buttermilk. Both will keep your cupcakes moist while maintaining that rich texture.
2. How do I store leftover Oreo Cupcakes?
To maintain freshness and preserve the texture of your baked goods, place them inside a well-sealed, airtight container. Keep them at a stable room temperature if you plan to enjoy them within the next couple of days.
However, for extended storage and to prevent spoilage, it is best to refrigerate them, where they can remain in good condition for up to five days. If refrigerated, let them sit at room temperature for about 10 minutes before eating for the best flavor and texture.
3. Can I freeze these cupcakes?
Absolutely! Freeze unfrosted Oreo Cupcakes in an airtight container for up to 3 months. Let it sit out to reach room temperature, then add the frosting just before serving.
4. How can I make the frosting extra smooth?
Before beginning the preparation process, allow both the butter and cream cheese to sit at room temperature for a sufficient amount of time, ensuring they soften properly.
This step is crucial as it allows for smooth blending, creating a uniform texture in your mixture and preventing any lumps from forming during the mixing process. This helps everything blend evenly, giving you a frosting that’s smooth and creamy.
5. Can I use a different type of Oreo?
Yes! Switch it up with Golden Oreos for a hint of vanilla, go with Double Stuf for a richer bite, or add some excitement using Mint Oreos.
6. How should I break down Oreos to mix into the batter and frosting?
For a finer texture, pulse the cookies in a processor. If you prefer bigger bits, toss them in a zip-top bag and smash with a rolling pin.
7. Is it possible to bake these as bite-sized Oreo cupcakes instead of the standard size?
Yes! Simply divide the batter into a mini muffin tin and reduce the baking time to 10-12 minutes. Keep an eye on them so they don’t overbake!
