
If dessert had a spirit animal, Nutter Butter Peanut Butter Pie would be the golden retriever—loyal, crowd-pleasing, and always down to make your day better.Whether you’re juggling work deadlines, soccer practice, or just trying to sneak five minutes of peace before the next family group text explodes, this Nutter Butter Peanut Butter Pie is your sweet escape. No oven required, no fancy equipment—just some pantry staples, a spoon, and maybe a quiet moment to lick the bowl.
Now, before you roll your eyes and think, “Another complicated dessert I’ll never actually make,” hold up. This isn’t that. This Nutter Butter Peanut Butter Pie recipe is the baking equivalent of stretchy pants: comforting, forgiving, and made for real life.
We’re talking about a crushed cookie crust (hello, store-bought shortcut hero), a creamy peanut butter filling that tastes like a childhood hug, and a drizzle of warm fudge sauce that says, “Yeah, I’m a little extra—and proud of it.”
Perfect for potlucks, birthdays, last-minute gatherings, or just a regular Tuesday when you need a win—this Nutter Butter Peanut Butter Pie shows up for you. And bonus: picky eaters, chocolate lovers, smelling like a chocolate dream. It might even give off serious Matilda-style chocolate indulgence vibes, and even the “I’m not really into sweets” crowd somehow end up asking for seconds. (Suspicious, but we’ll allow it.)
If that’s your jam, you’ll love this easy Mandarin Orange Cake recipe too, So let’s talk ingredients, tips, and how to whip this magic up in your own kitchen—because dessert this good deserves a permanent spot in your recipe rotation.
Contents
- 1 Why You’ll Love This Nutter Butter Peanut Butter Pie
- 2 Ingredients
- 3 Equipment
- 4 How to Make the Perfect Nutter Butter Peanut Butter Pie
- 4.1 Step 1: Crush the Cookies (A Little Therapy, Anyone?)
- 4.2 Step 2: Butter Makes It Better
- 4.3 Step 3: Warming the Fudge for Nutter Butter Peanut Butter Pie
- 4.4 Step 4: Mixing Cream Cheese and Sugar for Nutter Butter Peanut Butter Pie
- 4.5 Step 5: Bring on the Peanut Butter
- 4.6 Step 6: Folding in Cool Whip for Fluffy Nutter Butter Peanut Butter Pie
- 4.7 Step 7: Assemble the Dream
- 4.8 Step 8: Chill (The Nutter Butter Peanut Butter Pie and You)
- 4.9 Step 9: Drizzle and Serve
- 5 Cooking Tips for Your Nutter Butter Peanut Butter Pie
- 5.1 1. Don’t Overthink the Crust
- 5.2 2. Warm Fudge = Happy Spread
- 5.3 3. Go Easy with Natural Peanut Butter
- 5.4 4. Let That Cream Cheese Sit
- 5.5 5. Taste As You Go (Within Reason)
- 5.6 6. Folding Isn’t Just Laundry
- 5.7 7. Freezer vs. Fridge
- 5.8 8. Fancy It Up (Effortlessly)
- 5.9 9. Slicing Tips for a Clean Cut
- 5.10 10. Store It Right (If There’s Anything Left)
- 6 Nutritional Breakdown: What’s in a Slice of This Sweet Delight?
- 7 Cooking Time & Recipe Details
- 8 1. Can I substitute fresh garlic for garlic powder in this recipe?
- 9 2. How can I store leftovers, and how long will they last?
- 10 3. Can I make this recipe ahead of time for meal prep?
- 11 4. What’s the best way to reheat this dish?
- 12 5. Can I use rotisserie chicken instead of cooking fresh chicken?
Why You’ll Love This Nutter Butter Peanut Butter Pie
- No-Bake Wonder: No oven. No stress. Just pure peanut butter bliss.
- Made for Multitaskers: Assemble it while catching up on your favorite podcast or negotiating bedtime with a toddler.
- Crowd-Pleaser: This Nutter Butter Peanut Butter Pie disappears faster than you can say “save me a slice.”
Ingredients
For the Cookie Crust:
- 24 Nutter Butter cookies, finely crushed into crumbs
- 5 tablespoons melted butter
- 1 cup warm hot fudge sauce (for a smooth and easy spread)
For the Creamy Peanut Butter Filling:
- 8 ounces softened cream cheese
- 3/4 cup sifted powdered sugar
- 1 cup smooth peanut butter (avoid natural varieties for the best texture)
- 1 tablespoon pure vanilla extract
- 8 ounces defrosted Cool Whip
- Extra warm hot fudge for drizzling (optional)
Equipment
Before we get to the good stuff (a.k.a. eating pie), let’s make sure you’ve got everything you need. No fancy gadgets here—just kitchen basics:
- 9-inch pie dish
- Food processor or zip-top bag with rolling pin (for crushing cookies)
- Medium mixing bowl (for the crust)
- Large mixing bowl (for the filling)
- Electric hand mixer or stand mixer
- Rubber spatula
- Measuring cups and spoons
- Spoon or offset spatula (for spreading fudge and filling)
- Microwave-safe bowl or small saucepan (to warm the hot fudge)
- Plastic wrap or pie cover (for storing)
How to Make the Perfect Nutter Butter Peanut Butter Pie
Step 1: Crush the Cookies (A Little Therapy, Anyone?)
Start by placing 24 Nutter Butter cookies into a food processor. Pulse until they resemble fine crumbs—think beach sand, but way tastier. No processor? No problem. Toss those cookies into a large zip-top bag and crush them with a rolling pin or the bottom of a measuring cup. This step is oddly satisfying, especially if it’s been “one of those days.”
Step 2: Butter Makes It Better
Pour 5 tablespoons of melted butter into the cookie crumbs. Stir until all the crumbs are evenly coated and everything holds together like wet sand. If it still looks a bit dry, add a smidge more melted butter.
Carefully transfer the prepared blend into a 9-inch pie dish, using gentle but consistent pressure to shape it evenly along the base and all the way up the inner walls, ensuring a firm and compact layer throughout. Use the bottom of a glass or measuring cup to press it down nice and tight.
Pop the crust in the freezer for at least 15 minutes to help it firm up while you prepare the filling. This is the pie version of setting a solid foundation—you want it sturdy enough to hold all that peanut butter goodness.
Step 3: Warming the Fudge for Nutter Butter Peanut Butter Pie
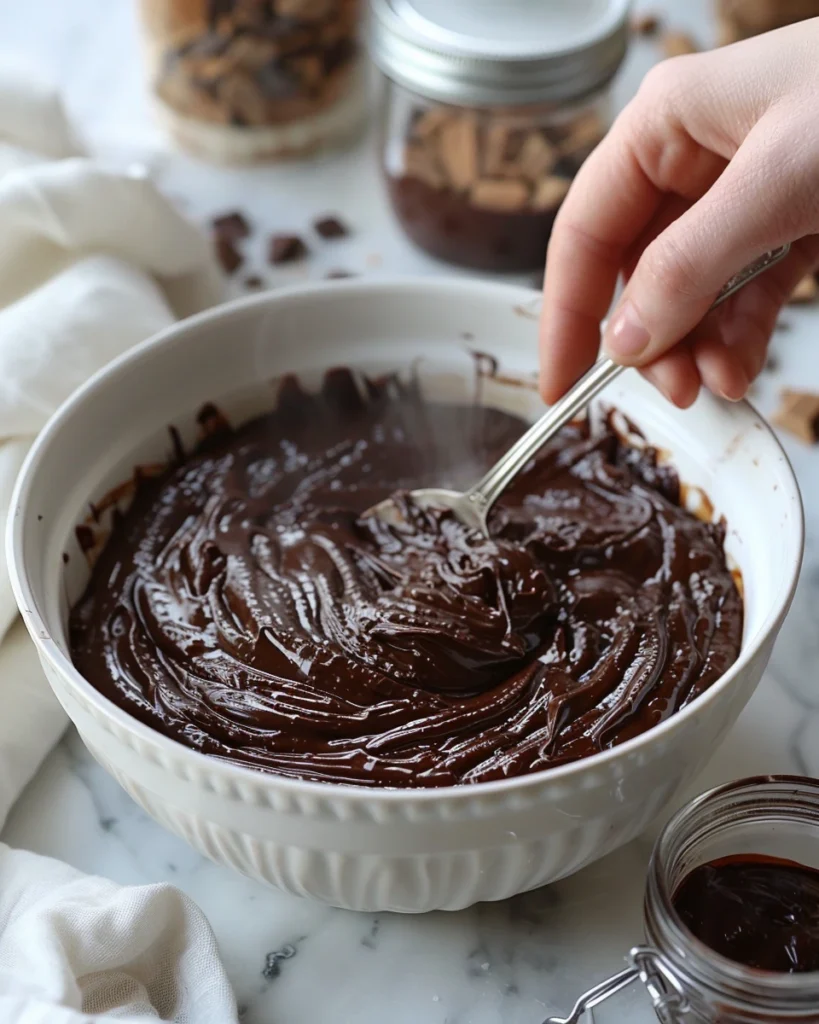
While your crust chills, warm up 1 cup of hot fudge sauce. You can microwave it in a small bowl for 15–20 seconds or gently warm it in a saucepan on low. The key is to get it pourable but not boiling lava. Once warmed, pour it over the chilled crust and gently spread it into an even layer. Return the Nutter Butter Peanut Butter Pie crust to the freezer so the fudge can set—5–10 minutes is perfect.
Step 4: Mixing Cream Cheese and Sugar for Nutter Butter Peanut Butter Pie

Now let’s make that dreamy peanut butter filling. In a large mixing bowl, beat 8 ounces of softened cream cheese until smooth and fluffy. No lumps allowed here! Add 3/4 cup of sifted powdered sugar and beat again until fully combined. This is your creamy base, and it should already be whispering sweet nothings to your sweet tooth.
Step 5: Bring on the Peanut Butter
Next, add 1 cup of smooth peanut butter (skip the natural kind—it tends to separate and mess with the texture). Pour in 1 tablespoon of pure vanilla extract and beat everything together until smooth, creamy, and downright irresistible.
You can sneak a taste here. It’s allowed. In fact, it’s required. Consider it quality control.
Step 6: Folding in Cool Whip for Fluffy Nutter Butter Peanut Butter Pie
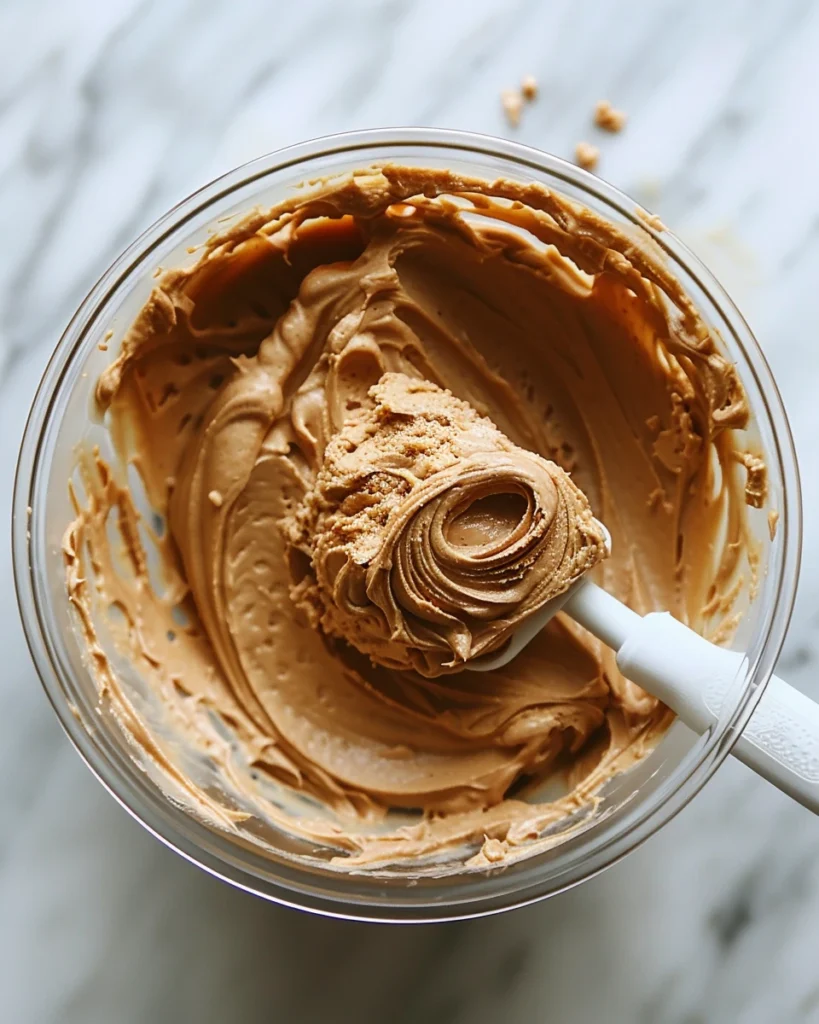
Take 8 ounces of defrosted Cool Whip and gently fold it into the peanut butter mixture using a rubber spatula. The key word here is gently. Don’t go in like a tornado—you want to keep the mixture light and airy. Once everything is fully incorporated and luscious, it’s time to build the Nutter Butter Peanut Butter Pie.
Step 7: Assemble the Dream
Pull your crust (with its fudge layer now nice and set) out of the freezer. Spoon the peanut butter filling on top and spread it evenly with a spatula. Smooth the top until it looks like something you’d see in a bakery window—and if it doesn’t, who cares? It’s going to taste amazing.
Step 8: Chill (The Nutter Butter Peanut Butter Pie and You)
Cover the Nutter Butter Peanut Butter Pie with plastic wrap and pop it into the fridge for at least 4 hours—or overnight if you’ve got the willpower. This gives the filling time to firm up and makes slicing much easier. Plus, the flavors have a little party in the fridge and get even better by the hour.
Step 9: Drizzle and Serve
When you’re ready to serve, warm up a little extra hot fudge and drizzle it on top. Zig-zag, swirl, go wild—it’s your pie. You could also top with extra crushed Nutter Butters or even whipped cream if you’re feeling festive.
Cooking Tips for Your Nutter Butter Peanut Butter Pie
Alright, you’ve got the steps down—but let’s talk about the little things that turn a “pretty good” pie into an “oh-my-gosh-is-there-more?” situation. These cooking tips are here to save your sanity, your time, and possibly your Nutter Butter Peanut Butter Pie crust.
1. Don’t Overthink the Crust
Listen, this crust is not a test. If your crushed Nutter Butters are a little chunky or not perfectly uniform, don’t sweat it. This isn’t Great British Bake Off—it’s your kitchen, and the crust is going to get covered in peanut butter filling anyway. Just make sure it sticks together, and you’re golden.
2. Warm Fudge = Happy Spread
One word of warning: cold fudge doesn’t spread—it clumps. Think trying to butter toast with a frozen stick. Warm your fudge just enough to get it smooth and glossy, like it’s ready for a skincare ad. Not boiling, not sizzling—just soft and spreadable. Or switch it up entirely and try something like this Fresh Apple Cake with Caramel Drizzle for a cozy fall twist. If it starts to thicken mid-spread, pop it back in the microwave for 10 seconds and try again.
3. Go Easy with Natural Peanut Butter
We know natural peanut butter has its fans, but for this Nutter Butter Peanut Butter Pie recipe, it’s not the time. Natural versions tend to separate and create a gritty, oily texture that doesn’t play nice with the cream cheese and Cool Whip. Stick with classic creamy peanut butter—the kind you grew up on.
4. Let That Cream Cheese Sit
Cold cream cheese is like a stubborn toddler—it refuses to blend and will absolutely cause lumps. Let it soften at room temperature for about 30 minutes before beating it. Trust us, your filling will be so much smoother, and your mixer will thank you.
5. Taste As You Go (Within Reason)
When you’re mixing the filling, go ahead and take a little taste. Just one. Okay, maybe two. Make sure it’s sweet enough for your crew. You can add a touch more powdered sugar if you like it extra sweet, or even a pinch of salt if you’re all about that salty-sweet contrast.
Just… don’t eat half the bowl before it hits the Nutter Butter Peanut Butter Pie crust. (We’ve been there.)
6. Folding Isn’t Just Laundry
When folding the Cool Whip into the peanut butter mixture, be gentle. Imagine you’re tucking in a baby like tucking in a blanket. If you’re curious about substitutions, here’s a handy article on Cool Whip alternatives and tips. You want to keep the fluffiness intact, not beat it into submission. Use a spatula and soft, sweeping motions to combine it without deflating all that airy goodness.
7. Freezer vs. Fridge
Need this Nutter Butter Peanut Butter Pie to set faster because you forgot to start early? Pop it into the freezer for about an hour—but don’t forget it there. If you leave it too long, you’ll end up with a peanut butter popsicle. Not the worst thing ever, but definitely not the creamy dream we’re going for.
8. Fancy It Up (Effortlessly)
Want to make it look like you spent way more time on this than you actually did? Try a few finishing touches:
- Drizzle extra fudge in a zig-zag pattern.
- Sprinkle crushed Nutter Butter cookies around the edge.
- Pipe whipped topping around the border (if you’re feeling fancy-fancy).
People will assume you have secret pastry chef skills. No need to correct them.
9. Slicing Tips for a Clean Cut
If you’ve ever hacked a Nutter Butter Peanut Butter Pie into a gloopy mess, this one’s for you:
Use a sharp knife dipped in hot water, and wipe it clean between slices. It keeps the layers neat, and the presentation Instagram-worthy—if that’s your thing.
10. Store It Right (If There’s Anything Left)
Wrap the Nutter Butter Peanut Butter Pie in plastic wrap or use a pie keeper with a lid. It’ll keep in the fridge for 3–4 days, but let’s be real—it won’t last that long. You can freeze slices individually if you want a ready-to-go treat later. Just thaw in the fridge before eating for the best texture.
This Nutter Butter Peanut Butter Pie is super forgiving, wonderfully flexible, and always shows up like your most reliable friend. With these tips, you’ll have everything you need to pull it off like a pro—even if your baking skills usually stop at break-and-bake cookies.
Nutritional Breakdown: What’s in a Slice of This Sweet Delight?
Let’s be honest—this Nutter Butter Peanut Butter Pie is not pretending to be health food. It’s rich, creamy, and unapologetically indulgent. But when you’re treating yourself or feeding a crowd, it’s nice to know what you’re actually working with in each slice.
Each serving packs a punch of flavor and that classic sweet-salty combo, but it also brings some nutritional value to the table—thanks to the peanut butter (hello, protein!) and dairy. Just remember: this Nutter Butter Peanut Butter Pie is all about balance. You’re not eating it for breakfast (okay, maybe once…), but as a dessert or celebration treat, it’s totally worth it.
Here’s a breakdown of the typical nutritional values per slice. These numbers are based on one-eighth of the entire Nutter Butter Peanut Butter Pie. Keep in mind, exact values can vary slightly depending on the brands you use and your drizzle game (heavy-handed hot fudge lovers, we see you).
Nutrition Facts (Per Serving – 1 Slice of Nutter Butter Peanut Butter Pie)
| Nutrient | Amount per Serving (Est.) |
|---|---|
| Serving Size | 1 slice (1/8 of pie) |
| Calories | 520–560 kcal |
| Total Fat | 35–38 g |
| Saturated Fat | 13–15 g |
| Unsaturated Fat | 15–17 g |
| Trans Fat | <1 g |
| Cholesterol | 35–45 mg |
| Sodium | 350–420 mg |
| Carbohydrates | 45–48 g |
| Fiber | 2–3 g |
| Sugar | 30–34 g |
| Protein | 7–9 g |
| Calcium | 6–8% DV |
| Iron | 8–10% DV |
| Potassium | 180–220 mg |
A Quick Note:
While this dessert is rich in sugars and fats (it’s pie, after all), it also delivers some nutritional perks—peanut butter provides protein, healthy fats, and a little fiber, while cream cheese and Cool Whip bring in calcium. So go ahead and enjoy it in moderation… with zero guilt and a whole lot of joy.
Cooking Time & Recipe Details
Even though this Nutter Butter Peanut Butter Pie looks like something you’d find behind a glass case at a fancy bakery, it’s actually a no-bake, low-stress dessert that comes together in no time (unless you’re counting chill time—but that’s your fridge doing the work).
Here’s table of cooking time you need to know to plan ahead:
| Prep Time | 20 minutes |
|---|---|
| Cook Time | 0 minutes (no baking needed!) |
| Chilling Time | 4 hours (or overnight) |
| Total Time | 4 hours 20 minutes |
Yield
| Yield | One 9-inch pie (Serves 8 generous slices) |
If you’re slicing for a party or want smaller portions (good luck with that!), you could stretch it to 10–12 smaller slices—but most folks will be asking for seconds.
Cuisine
- American
This Nutter Butter Peanut Butter Pie is pure Americana: creamy peanut butter, nostalgic Nutter Butter cookies, and Cool Whip—basically a backyard BBQ or potluck hero just waiting to happen.
So there you have it—the perfect ending to a long day or the star of your next gathering. This Nutter Butter Peanut Butter Pie isn’t just a dessert; it’s a no-fuss crowd-pleaser that looks impressive without needing hours in the kitchen.
Whether you’re dealing with picky eaters, juggling work and home life, or just craving something sweet and nostalgic or just craving something sweet and nostalgic like this 5-minute Pineapple Dump Cake, this Nutter Butter Peanut Butter Pie has your back. Creamy, crunchy, rich, and ready to steal the show — kind of like this Crack Cake that’s dangerously good, it’s the kind of treat that gets requested again and again.
So go ahead, slice in, share the love, and don’t be surprised when everyone asks for your Nutter Butter Peanut Butter Pie recipe. Just smile and enjoy the sweet, peanut-buttery praise.
1. Can I substitute fresh garlic for garlic powder in this recipe?
Absolutely! If you’re out of fresh garlic, garlic powder works great. Just use about 1/4 teaspoon of garlic powder per clove of fresh garlic called for. It’s a handy pantry swap that keeps the flavor going strong.
2. How can I store leftovers, and how long will they last?
Any remaining portions should be carefully transferred to a well-sealed container to maintain freshness, then placed in the refrigerator to preserve their quality for later enjoyment. Most dishes will stay fresh for up to 3–4 days. If you’re working with a creamy chicken rice casserole or similar, reheat gently to avoid drying it out.
3. Can I make this recipe ahead of time for meal prep?
Yes! This is a great meal prep option. Just prepare everything, cover tightly, and refrigerate. You can bake it fresh the next day or freeze it for later. Casseroles and soups especially hold up well.
4. What’s the best way to reheat this dish?
Reheat in the oven at 350°F until warmed through, or use the microwave in 30-second bursts. For something like a cheesy casserole, cover with foil while baking to keep it moist and melty.
5. Can I use rotisserie chicken instead of cooking fresh chicken?
Definitely! Utilizing a pre-cooked rotisserie chicken can significantly reduce overall preparation time while simultaneously enhancing the dish with its rich, seasoned taste that develops during slow roasting. Just shred it and mix it in. It works wonderfully in recipes like creamy chicken and mushroom skillet or chicken pot pie soup.
