Let’s be real for a minute: life can get wild. Between juggling work deadlines, navigating homework meltdowns, and managing that ever-growing laundry mountain, it’s easy to feel like there’s just no time left to treat yourself. That’s where these Boston cream cupcakes come in, like little edible hugs that say, “Hey, you deserve a moment.”
I first whipped these up on a random Tuesday when I was craving something indulgent—but didn’t want the hassle of making an entire cake. (Because who’s got time to wrestle with a multi-layer dessert on a weeknight?) These bite-sized beauties have all the luxurious charm of a Boston cream pie, just wrapped up in a neat, hand-held package.
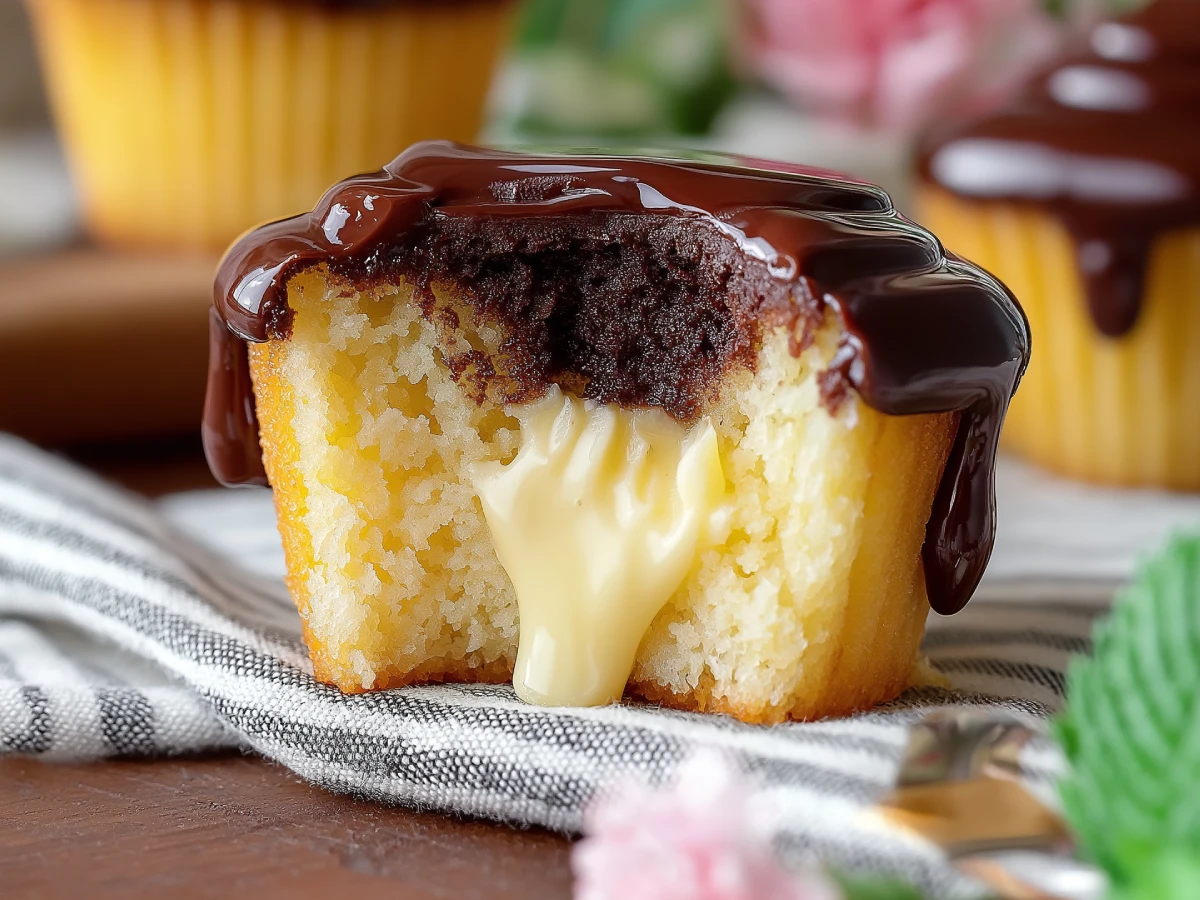
We’re talking about fluffy, vanilla-scented cupcakes filled with silky pastry cream, For a detailed guide on making the perfect vanilla pastry cream, check out our vanilla pastry cream recipe and topped with a glossy chocolate ganache that makes your kitchen smell like a fancy bakery. Sound complicated? It’s not. This recipe was designed for busy women like you—moms, professionals, multitasking queens—who want something special without needing a culinary degree.
So whether you’re looking to impress your brunch squad, need a pick-me-up for your book club, or just want a quiet moment of joy after the kids are in bed—these Boston cream cupcakes are your sweet little answer.
Contents
- 1 Why You’ll Love These Boston Cream Cupcakes
- 2 Equipment You’ll Need
- 3 Step-by-Step Guide: How to Make Boston Cream Cupcakes
- 4 Cooking Tips for Sweet Success
- 5 From My Kitchen to Yours
- 6 Storage Tips: Keeping Your Boston Cream Cupcakes Fresh and Fabulous
- 7 Nutrition: What’s Inside These Little Cream-Filled Beauties?
- 8 Let’s Talk Time: How Long Do These Boston Cream Cupcakes Take?
- 9 Cooking Time Breakdown
- 10 Yield & Serving Info
- 11 Cuisine Style
- 12 Frequently Asked Questions
Why You’ll Love These Boston Cream Cupcakes
- They’re the perfect combo of creamy, cakey, and chocolaty.
- No need for a fork or plate—just peel, bite, and smile.
- Totally make-ahead friendly (because your time is precious).
- That ganache glaze? Looks super fancy with zero stress.
Equipment You’ll Need
Before we dive into the magic, let’s round up the kitchen essentials. Here’s what you’ll need to make these dreamy Boston cream cupcakes:
- 2 mixing bowls (one large, one medium)
- Medium saucepan
- Whisk (trust me, you’ll be besties with it during the pastry cream part)
- Hand mixer or stand mixer
- Measuring cups & spoons
- Fine mesh strainer (optional, but great for extra smooth cream)
- Muffin tin (12-cup standard size)
- Cupcake liners
- Cooling rack
- Small knife or piping tip (for filling cupcakes)
- Small microwave-safe bowl or double boiler (for ganache)
Step-by-Step Guide: How to Make Boston Cream Cupcakes
1. Start with the Silky Pastry Cream Filling
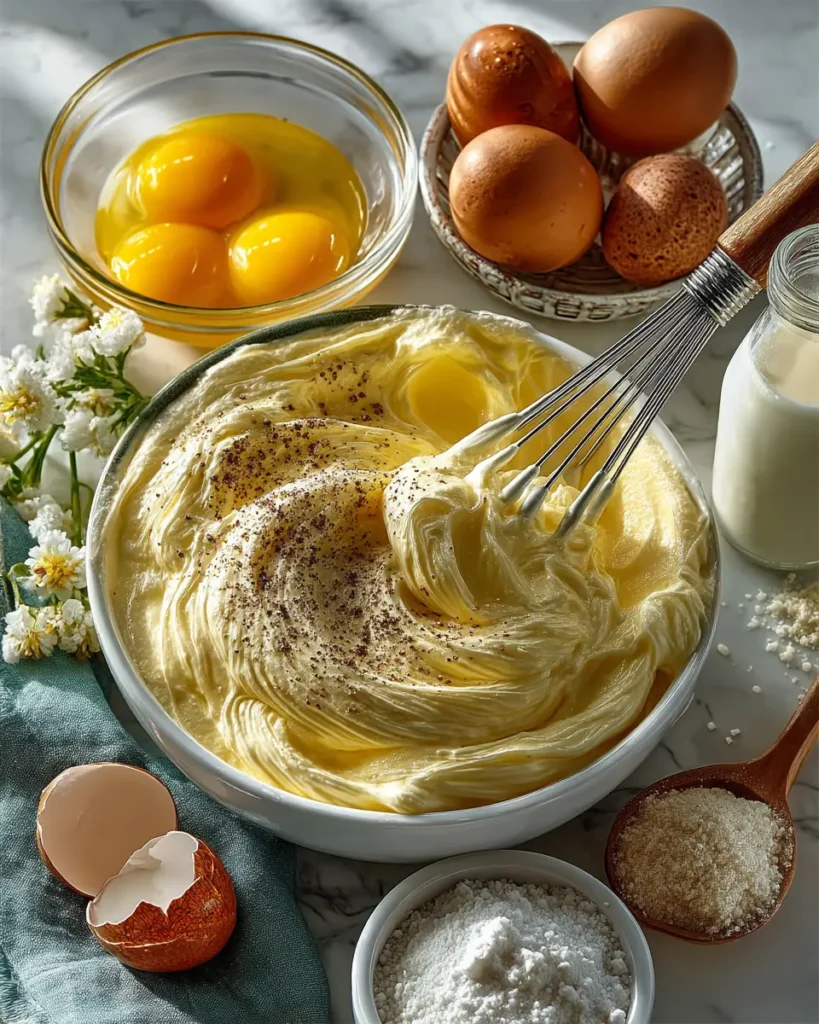
Because what are Boston cream cupcakes without their luscious, creamy heart?
Step 1: Heat the base In a medium saucepan, combine 1 cup milk, 1 cup heavy cream, ¼ tsp salt, and 3 tablespoons sugar over medium heat. Stir occasionally and bring it just to a simmer. Don’t let it boil—just get those tiny bubbles around the edges. Then take it off the heat and set it aside.
Step 2: Whisk up the egg mix In a mixing bowl, whisk together 5 egg yolks, the remaining ⅓ cup sugar, and 3 tablespoons cornstarch until smooth and pale yellow. It should look thick but pourable — kind of like a fancy custard base.
Step 3: Temper the eggs (fancy word, easy task) Slowly drizzle about ½ cup of the hot milk mixture into the egg yolks while whisking constantly. This step gently warms up the eggs so they don’t scramble. Once combined, pour the egg mixture back into the saucepan with the rest of the milk mix.
Step 4: Cook to pudding perfection Put the saucepan back on medium heat. Whisk constantly until it thickens into a rich pastry cream—about 2–3 minutes. You’ll know it’s ready when it coats the back of a spoon and leaves a trail when you run your finger through it.
Step 5: Add flavor & cool down Remove from heat and stir in 1 teaspoon vanilla extract and 4 tablespoons butter, one piece at a time. Once everything’s melted and smooth, pour the cream into a bowl and press plastic wrap directly onto the surface. Chill it in the fridge for at least 2 hours (or up to 3 days!).
Tip: If you’re fancy or patient, you can strain it through a mesh sieve for the smoothest pastry cream ever.
2. Let’s Bake Those Boston Cream Cupcakes
Time for the cakey part of our Boston cream cupcakes. These are buttery, fluffy, and built to cradle that pastry cream like a pro.

Step 1: Preheat & prep Set your oven to 350°F (175°C) and line a standard muffin tin with cupcake liners. This recipe makes 12–14 cupcakes, depending on how generous you are.
Step 2: Cream butter, oil & sugar In a large bowl, use a mixer to blend ½ cup softened butter, ½ cup avocado oil, and 1¾ cups sugar until light and fluffy—about 2–3 minutes. That air is your secret to soft cupcakes.
Step 3: Add eggs & vanilla Mix in 4 large eggs, one at a time. Scrape the bowl after each addition to make sure everything gets cozy. Stir in 2 teaspoons vanilla extract.
Step 4: Combine the dry stuff In another bowl, whisk together 3 cups flour, 1 tablespoon baking powder, and ¾ teaspoon salt.
Step 5: Alternate mixing Add the dry mixture to the wet ingredients in thirds, alternating with 1¼ cups buttermilk. Start and end with dry ingredients. Mix until just combined—don’t overbeat unless you want tough cupcakes (nobody does).
Step 6: Bake! Fill each cupcake liner about ¾ full. Bake for 18–20 minutes, or until a toothpick poked in the center comes out clean. Let them cool in the pan for 5 minutes, then transfer to a wire rack to cool completely.
3. Fill ‘Em Up with Creamy Goodness
Once your Boston Cream Cupcakes are cool and your pastry cream is chilled, it’s time for the best part.
Step 1: Core the cupcakes Use a small knife or piping tip to cut a little cone out of the center of each cupcake. Don’t go too deep—just enough to tuck in some of that golden goodness.
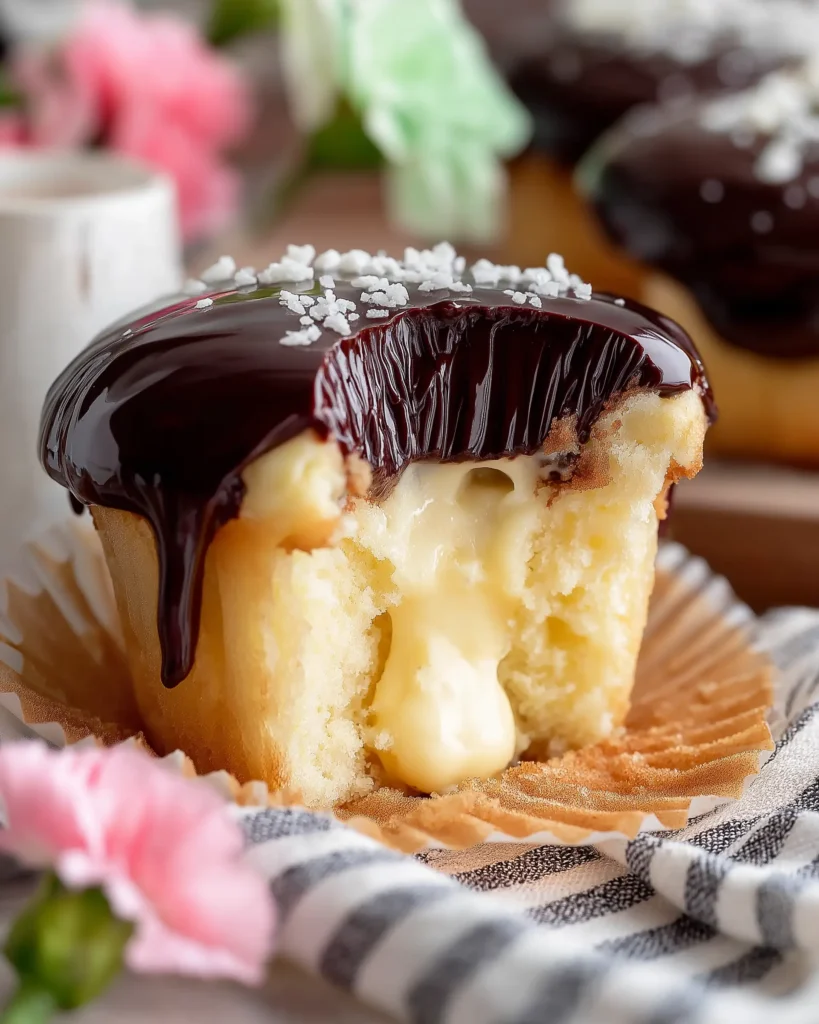
Step 2: Fill with pastry cream Spoon or pipe in the pastry cream until each cupcake is full (a little dome is totally okay—it’s a sign of abundance!). Pop the cupcake tops back on if you want or leave them open for the ganache to seal the deal.
4. Ganache Time
That glossy chocolate topping is what gives Boston cream cupcakes their drama.
Step 1: Melt the magic In a microwave-safe bowl, combine 1 cup semisweet chocolate chips, ½ cup heavy cream, and 2 tablespoons light corn syrup. Microwave in 30-second bursts, stirring in between, until smooth.
Step 2: Add sweetness Whisk in ⅓ cup powdered sugar until smooth and pourable. Let it cool slightly so it thickens just enough to cling.
Step 3: Top it off Spoon ganache over each filled cupcake, letting it drip down the sides like a little chocolate waterfall. You can use the back of a spoon to swirl it around or leave it artfully messy. Either way, they’ll look bakery-worthy.
Cooking Tips for Sweet Success
- Don’t overfill the Boston Cream Cupcakes or the cream will rebel and burst out like a volcano.
- If your ganache is too runny, let it cool a few more minutes—it thickens fast.
- Want to make these ahead? Bake the cupcakes and store them unfilled for 2 days. Fill and frost just before serving for peak deliciousness.
- Cupcake liners peeling away? That’s usually from too much moisture. Let them cool fully before storing.
Bonus: If you accidentally eat three cupcakes while “taste-testing,” it’s totally valid research.
From My Kitchen to Yours
The first time I made these, it was a rainy Sunday, and my kids were bouncing off the walls. I needed a project to keep them occupied—and myself sane. We baked, filled, and frosted these Boston Cream Cupcakes together, and by the end, the kitchen looked like a chocolate tornado hit it… but they were grinning ear to ear.
Since then, these Boston cream cupcakes have become a family tradition. They’re my go-to for birthdays, school treats, or just because the day needs a little sugar. And honestly? That moment when you bite in and hit the cool pastry cream? Pure joy.
Storage Tips: Keeping Your Boston Cream Cupcakes Fresh and Fabulous
Let’s be honest—leftovers of these cupcakes are rare. But just in case your self-control wins out or you bake a big batch (go you!), here’s how to keep your Boston cream cupcakes tasting bakery-fresh:
- Refrigeration is your BFF. Because of that dreamy pastry cream, these cupcakes need to be stored in the fridge. Pop them in an airtight container and they’ll stay good for up to 4 days. I recommend letting them sit at room temp for 15–20 minutes before serving so the ganache softens and flavors shine.
- Freezing? Yes, with a twist. Freeze unfilled cupcakes and unmade ganache for up to 2 months. Wrap each cupcake individually in plastic wrap, then store in a freezer bag. When you’re ready, thaw at room temp, fill with fresh pastry cream, and top with ganache. Trust me, they’ll taste like you made them that day.
- Avoid soggy bottoms. Moisture can do weird things to your liners in the fridge. To prevent soggy cupcake bottoms, store them in a single layer—not stacked—and add a paper towel beneath them to soak up excess moisture.
Nutrition: What’s Inside These Little Cream-Filled Beauties?
We know—cupcakes aren’t exactly kale. But when you’re indulging, it helps to know what’s in your treat. These Boston cream cupcakes offer rich, satisfying flavor and just the right amount of decadence.
Each cupcake is filled with creamy custard, topped with luscious chocolate ganache, and baked with real butter and buttermilk for that soft, cloud-like crumb. While they’re definitely a dessert, they offer a nice balance of fats, protein, and carbs to keep your sweet tooth satisfied with just one.
This isn’t a “health food,” but it’s definitely a happiness food—and that counts for something too, right?
Nutrition Facts (Per Serving)
| Nutrient | Amount (Per 1 Cupcake) |
|---|---|
| Serving Size | 1 cupcake (approx. 120g) |
| Calories | 365 kcal |
| Total Fat | 20g |
| Saturated Fat | 10g |
| Unsaturated Fat | 8g |
| Trans Fat | 0.2g |
| Cholesterol | 85mg |
| Sodium | 150mg |
| Total Carbohydrates | 42g |
| Dietary Fiber | 1g |
| Total Sugars | 28g |
| Added Sugars | 26g |
| Protein | 5g |
| Calcium | 60mg |
| Iron | 1.8mg |
| Potassium | 120mg |
| Vitamin A | 280IU |
| Vitamin C | 0mg |
| Vitamin D | 0.8mcg |
Note: Values are estimates based on standard ingredients. Actual values may vary depending on brands used and portion sizes.
Let’s Talk Time: How Long Do These Boston Cream Cupcakes Take?
We know your time is precious—between work meetings, kid pickups, and trying to actually finish a cup of coffee before it goes cold. So here’s the time breakdown to help you plan ahead for these glorious Boston cream cupcakes.
This recipe is a little more involved than your average box mix, but every minute is worth it when you bite into that creamy center. And the best part? You can prep parts ahead to make your baking day a breeze.
Cooking Time Breakdown
| Task | Time Needed |
|---|---|
| Prep Time | 30 minutes |
| Cook Time | 20 minutes |
| Chilling Time | 2 hours (for pastry cream) |
| Assembly Time | 15 minutes |
| Total Time | Approximately 3 hours 5 minutes |
Pro Tip: Make the pastry cream a day in advance and store it in the fridge. Then you’ll only need an hour or so the next day to bake, fill, and frost!
Yield & Serving Info
| Yield | 12–14 cupcakes |
|---|---|
| Serving Size | 1 cupcake |
| Best Served | Slightly chilled or room temp |
| Perfect For | Birthdays, brunches, book clubs, or “just because” days! |
Cuisine Style
| Cuisine | American |
|---|---|
| Inspired By | Classic Boston Cream Pie (New England roots!) |
These Boston cream cupcakes take a beloved American dessert and give it a handheld twist—perfect for today’s modern multitaskers who want their cake and want to eat it anywhere.
And just like that, you’ve got a batch of Boston cream cupcakes that could rival any bakery in town. These little treats may look fancy, but they’re really just comfort food in a party dress—perfect for making an ordinary day feel a little more special. Whether you’re sneaking one after bedtime, bringing a dozen to a get-together, or baking with your kiddos on a rainy afternoon, they’ve got that just-right blend of nostalgia and indulgence.
Plus, you now have the power to whip up silky pastry cream, fluffy cupcakes, and glossy ganache like a total pro. So go ahead—bookmark this one, pin it, print it, share it with your cupcake-loving crew. Because once you taste that first bite, with the soft cake, creamy center, and rich chocolate top, you’ll know exactly why these Boston cream cupcakes are worth every sweet second.
Now that’s a treat worth savoring.
Frequently Asked Questions
Can I substitute the buttermilk in this Boston Cream Cupcakes recipe?
Yes! If you don’t have buttermilk on hand, you can mix 1 tablespoon of lemon juice or white vinegar with 1¼ cups of milk. Let it sit for 5–10 minutes before using. It won’t taste exactly the same, but your Boston cream cupcakes will still be tender and delicious.
Do I really need to chill the pastry cream?
Definitely. Chilling allows it to thicken and set properly, which keeps it from oozing out when you fill your Boston Cream Cupcakes. It’s the key to those picture-perfect boston cream cupcakes.
How should I store leftover Boston Cream Cupcakes?
Since they’re filled with cream, store any leftover boston cream cupcakes in an airtight container in the fridge for up to 4 days. Let them sit out a bit before serving for best flavor and texture.
Can I make the Boston Cream Cupcakes ahead of time?
Absolutely. You can bake the Boston Cream Cupcakes and make the pastry cream a day or two ahead. Assemble and frost the day you serve them for the freshest taste and best presentation.
What’s the best way to fill the Boston Cream Cupcakes?
Use a piping bag fitted with a round tip, or a zip-top bag with the corner snipped off. You can also spoon it in—just be sure to cut a well in the center first. Either way, your Boston cream cupcakes will be beautifully filled.
