Let’s be real—life moves fast. Between juggling meetings, school pickups, and maybe even convincing a toddler that green beans are, in fact, not poison, there’s not always time to whip up something fancy. But what if I told you that a slice of luxurious, melt-in-your-mouth dessert was just a mixing bowl away? Enter the cheesecake bistro.
This isn’t your average cheesecake. It’s the kind of dessert that whispers “you’ve got this” after a long day. It’s rich, creamy, and packed with that classic bistro charm—but made right in your kitchen, with zero fancy-pants skills required.
I first whipped this up on a weeknight whim, right after I spilled coffee on my to-do list (again). The kitchen smelled like vanilla dreams, and one bite in, my kids were quiet. That alone was worth it. Whether you’re impressing dinner guests, celebrating “just because,” or sneaking a forkful from the fridge after bedtime—this cheesecake bistro is here for all of it.
So if you’re craving comfort with a touch of elegance, pull out that mixer. You’re about to fall in love with a dessert that feels like it came straight from your favorite café—but fits right into your real-life routine.
Contents
- 1 Why You’ll Love This Cheesecake Bistro
- 2 🧁 Equipment: What You’ll Need Before You Begin
- 3 Ingredients – The Essentials for Cheesecake Bistro Bliss
- 4 👩🍳 Step-by-Step: How to Make Your Own Cheesecake Bistro Masterpiece
- 4.1 Step 1: Prepare the Crust – Because Every Great Cheesecake Starts with a Solid Base
- 4.2 Step 2: Get That Cream Cheese Dreamy
- 4.3 Step 3: Vanilla & Eggs—The Real Flavor Party Begins
- 4.4 Step 4: Add the Cream (and Maybe a Little More)
- 4.5 Step 5: Pour & Smooth
- 4.6 Step 6: For extra smoothness, use a gentle steam bake (optional).
- 4.7 Step 7: The Most Important Step—Wait!
- 5 🧁 Cooking Tips: Make Your Cheesecake Bistro Experience Even Better
- 6 ❤️ A Little Story from My Kitchen
- 7 🧊 Storage Tips: Keeping Your Cheesecake Bistro Fresh & Fabulous
- 8 🥄 Nutrition: What’s Inside This Creamy Dream?
- 9 ⏰ Timing Is Everything: How Long to Make This Cheesecake Bistro Shine
- 10 🍽 Yield
- 11 🌍 Cuisine
- 12 ❓ Frequently Asked Questions About This Cheesecake Bistro Recipe
- 12.1 Is it okay to swap in light cream cheese instead of the regular kind?
- 12.2 What if I don’t have a springform pan?
- 12.3 How do I store leftovers?
- 12.4 Can I add toppings to this cheesecake?
- 12.5 Is a water bath really necessary?
- 12.6 Can I make this ahead of time?
- 12.7 Can I turn this into mini cheesecakes?
Why You’ll Love This Cheesecake Bistro
- It’s perfect for when life is busy but your sweet tooth won’t quit.
- Creamy, dreamy texture that tastes like it came from a downtown bistro.
- Customizable for birthdays, holidays, or random Tuesdays (we don’t judge).
🧁 Equipment: What You’ll Need Before You Begin
Before we enter cheesecake bistro heaven, let’s make sure your kitchen is ready for action:
- 9-inch springform pan (your cheesecake’s cozy home)
- Large mixing bowls (for wet and dry mixes)
- Hand or stand mixer (because no one wants to stir cream cheese by hand)
- Rubber spatula (to scrape every last bit of goodness)
- Measuring cups and spoons
- Whisk
- Aluminum foil (for that optional water bath)
- Roasting pan (if using the water bath method)
- Wire cooling rack
- Plastic wrap and fridge space (because good cheesecake needs chill time)
Ingredients – The Essentials for Cheesecake Bistro Bliss
For the Crust:
- 2 cups graham cracker crumbs (about 198 grams)
- 1/3 cup granulated sugar (67 grams)
- 7 tablespoons melted butter (99 grams)
For the Creamy Cheesecake Filling:
- 40 oz full-fat cream cheese, room temperature (that’s 5 blocks—no skimping)
- 1½ cups granulated sugar (300 grams)
- 1 tablespoon pure vanilla extract
- 5 large eggs, room temperature
- 3 large egg yolks, room temperature
- ½ cup heavy cream (113 ml), room temperature
Pro tip: Add an extra ¼ cup for next-level creaminess.
👩🍳 Step-by-Step: How to Make Your Own Cheesecake Bistro Masterpiece
Step 1: Prepare the Crust – Because Every Great Cheesecake Starts with a Solid Base
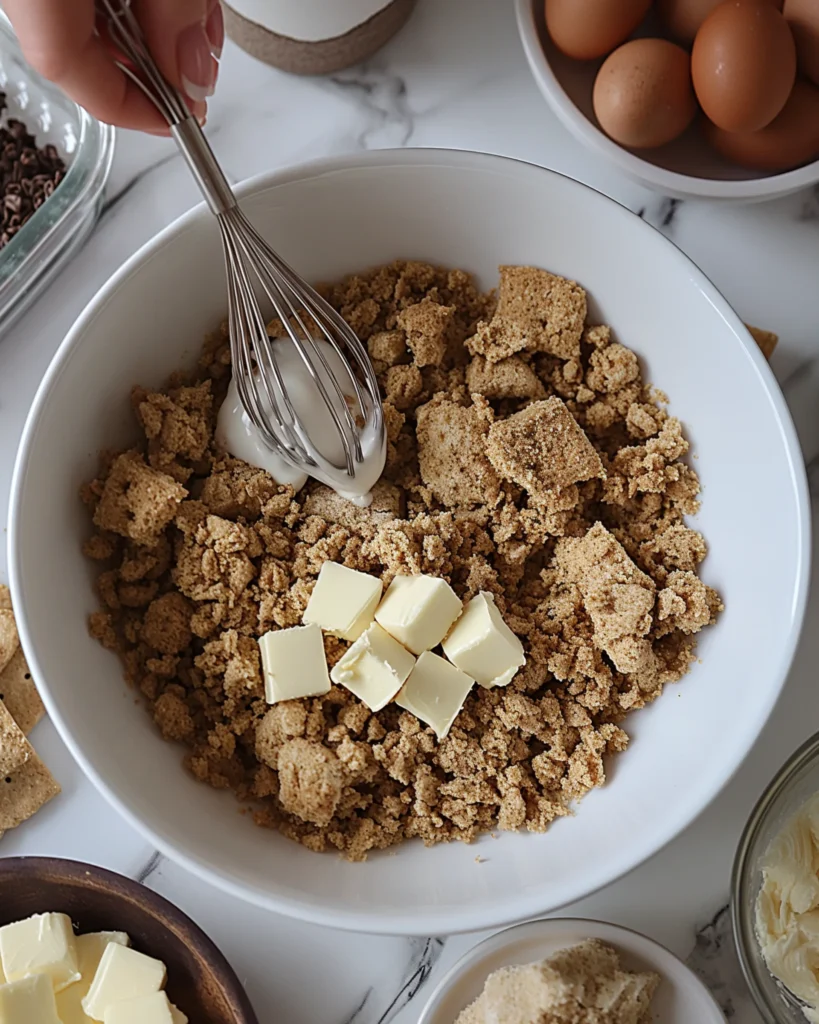
Grab a medium-sized bowl. Mix 2 cups graham cracker crumbs, 1/3 cup sugar, and 7 tablespoons melted butter until the texture feels like damp sand. If your kitchen smells like a sweet summer campfire, you’re doing it right.
Spread the mixture evenly across the base of your pan and press it down tightly to form a solid layer. Use the bottom of a glass to smooth it out. Pop it in the fridge to set while we move on. No need to pre-bake—this is cheesecake bistro style: easy, creamy, and no overthinking.
Step 2: Get That Cream Cheese Dreamy
Place all 5 blocks of cream cheese into a large mixing bowl. Make sure they’re room temperature. Seriously, don’t skip this step—cold cream cheese is like mixing bricks. Use a mixer on medium speed and beat until it’s smooth and fluffy.
Add 1½ cups sugar slowly, then beat until everything’s combined. Use your spatula to gather anything sticking to the bowl’s edges and bring it back into the mix. We’re not leaving anyone behind.
Step 3: Vanilla & Eggs—The Real Flavor Party Begins
Pour in 1 tablespoon vanilla extract and mix until just combined.
Next, add the 5 whole eggs, one at a time, mixing gently between each. Then add the 3 yolks. Be gentle with the mixing—treat it like you’re folding a soft blanket, not doing an intense workout. You want the batter silky, not whipped like a mousse.
Step 4: Add the Cream (and Maybe a Little More)
Add half a cup of thick cream and gently stir it into the mixture until fully combined. Want your cheesecake bistro-style extra creamy? Add another ¼ cup—you won’t regret it.
Step 5: Pour & Smooth
Take your crust from the fridge. Spoon the mixture onto the crust, then gently level the surface with a spatula, giving it a soft, airy finish.
Tap the pan gently on the counter to release any sneaky air bubbles.
Step 6: For extra smoothness, use a gentle steam bake (optional).
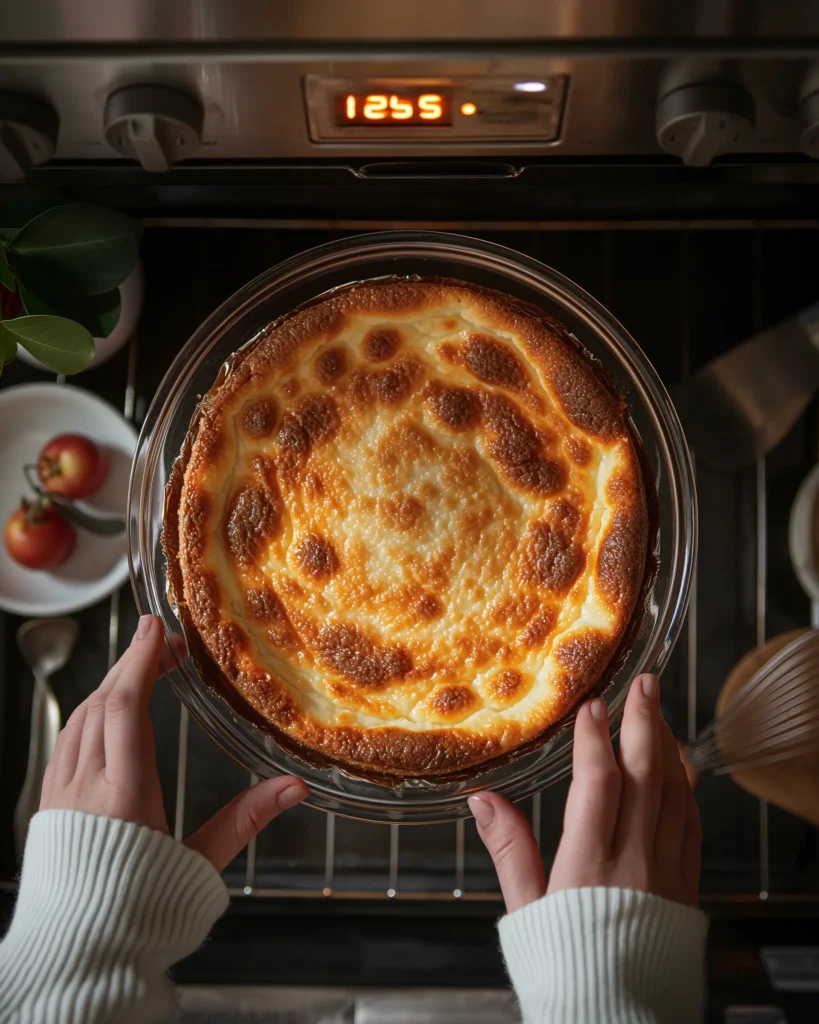
Cover the bottom and sides of your springform pan with foil to keep it sealed from the outside. Place it in a roasting pan and fill with about 1 inch of hot water.
Bake at 325°F (163°C) for 1 hour and 20 minutes, or until the outer edges are set but the center still has a slight jiggle—like a classy little cheesecake shimmy.
Step 7: The Most Important Step—Wait!

Once baked, turn off the oven and crack the door open. Let your cheesecake sit inside for 1 hour. This prevents cracks and gives it that smooth cheesecake bistro finish.
Then transfer it to a cooling rack until it reaches room temperature. Finally, refrigerate for at least 6 hours (overnight is even better). The flavor deepens, and the texture becomes that perfect creamy-meets-sliceable balance.
🧁 Cooking Tips: Make Your Cheesecake Bistro Experience Even Better
- Room temp is everything. Cream cheese, eggs, and cream should be room temp. Cold ingredients cause lumps. Lumps lead to stress. Stress leads to forgetting the cheesecake in the oven. We’ve all been there.
- Don’t overmix. You’re baking cheesecake, not auditioning for a pastry chef marathon. Overmixing = too much air = cracked tops. Gently fold like you’re tucking a baby in for a nap.
- The jiggle test is real. A little wobble in the middle is perfect. It’ll firm up in the fridge. If it looks fully set in the oven, it’s likely overbaked.
- No water bath? No worries. Just place a separate pan of hot water on the rack below the cheesecake. It adds moisture without the fuss of wrapping your pan like a Christmas gift.
- Slice clean, live clean. For neat slices, dip your knife in hot water and wipe it between cuts. Or just embrace the mess—it all tastes the same.
- Customize your top. Add fruit like this Strawberry Cheesecake Cake, chocolate ganache, or a swipe of caramel. Or leave it naked—it’s got enough personality to stand on its own.
❤️ A Little Story from My Kitchen
I made this cheesecake bistro recipe the first time during a chaotic holiday dinner. You know the kind—gravy spilled, the dog ran off with a dinner roll, and everyone showed up an hour early. The only calm in the chaos? This cheesecake.
It was the dessert that made everyone stop talking and start smiling Kind of like how our crack cake brings the crowd to silence with one bite. My sister asked for the recipe. My dad went back for seconds (and thirds). Now, it’s the dish I bring to every family event—because I know it’ll save the day when the mashed potatoes don’t.
🧊 Storage Tips: Keeping Your Cheesecake Bistro Fresh & Fabulous
Ah, the beauty of cheesecake—it tastes just as good (if not better) the next day. Here’s how to store your cheesecake bistro creation like a pro:
In the Fridge:
After your cheesecake has chilled for at least 6 hours post-bake, cover it with plastic wrap or foil and keep it in the fridge. It’ll stay fresh and fabulous for up to 5 days. Use an airtight container if you’ve got fridge snack thieves (aka children).
Pro tip: If you’re serving slices one at a time (a.k.a. treating yourself all week), store them individually in small containers. No fuss, no drying out.
In the Freezer:
Want to make your cheesecake bistro ahead of time or save a few slices for a rainy day? Wrap it tightly in plastic wrap, then again in foil to avoid freezer burn. Store in a freezer-safe bag or container. It’ll stay delicious for up to 2 months.
To thaw, place it in the fridge overnight. Do not microwave it—cheesecake doesn’t like fast change (just like most of us).
Bonus Tip:
If you plan to freeze it, skip any toppings (like fresh fruit or ganache) until you’re ready to serve. They don’t always play nice in the freezer.
🥄 Nutrition: What’s Inside This Creamy Dream?
Let’s be honest—cheesecake isn’t here to win “most low-cal” award. But it is packed with comfort, joy, and a whole lot of flavor. Here’s a look at the nutritional side of our cheesecake bistro (because balance, right?).
This breakdown is based on 1 slice (1/12th of the cheesecake)—aka the serving size most of us reach for after dinner.
Nutritional Value Per Serving:
| Nutrient | Amount Per Slice |
|---|---|
| Serving Size | 1 slice (approx. 170g) |
| Calories | 525 |
| Total Fat | 38g |
| Saturated Fat | 21g |
| Unsaturated Fat | 13g |
| Trans Fat | 0.5g |
| Cholesterol | 195mg |
| Sodium | 340mg |
| Total Carbohydrates | 37g |
| Dietary Fiber | 0g |
| Total Sugars | 29g |
| Added Sugars | 25g |
| Protein | 8g |
| Calcium | 120mg |
| Iron | 1.2mg |
| Potassium | 170mg |
| Vitamin A | 900 IU |
| Vitamin C | 0mg |
Why It Matters:
Yes, it’s indulgent—but cheesecake bistro isn’t meant to be a “diet” food. It’s your go-to for celebrations, comforting nights, or when you just need a little win. if you’re feeling adventurous, swap to a bold flavor like this no-bake matcha tiramisu With a solid dose of protein, calcium, and joy (the unofficial nutrient), it’s a slice well worth savoring.
⏰ Timing Is Everything: How Long to Make This Cheesecake Bistro Shine
Let’s face it—good things take time, and this cheesecake bistro recipe is no exception. But trust me, it’s totally worth the wait. Here’s how the time breaks down so you can plan your sweet escape without the guesswork.
| Prep Time | 25 minutes |
|---|---|
| Cook Time | 1 hour 20 minutes |
| Chilling Time | Minimum 6 hours (overnight is best) |
| Cool Down Time | 1 hour in oven + 1 hour on counter |
| Total Time | About 9 hours (hands-on time is under 1 hour!) |
Bonus Time Tip:
Want to break it up? Make the crust and filling in the evening, bake it, and chill overnight. If you love make-ahead treats, try these gluten-free carrot cake cupcakes It’s even better the next day—and it makes you feel like a meal prep queen.
🍽 Yield
- Yield: 1 full 9-inch cheesecake
- Servings: 12 slices (generous ones, because we don’t mess around)
Got a bigger crowd? Double the recipe or go for individual crowd-pleasers like these Oreo cupcakes and make two cheesecakes—or cut smaller slices if you’re feeding a crowd (though don’t be surprised if people sneak seconds).
🌍 Cuisine
- Cuisine: American
This cheesecake bistro recipe is rooted in classic American dessert love—rich, indulgent, and made with that extra dose of homemade comfort. Think New York-style creaminess with bistro flair, straight from your kitchen.
When it comes to dessert, there’s just something magical about a cheesecake bistro creation that feels both indulgent and totally doable. It’s that perfect balance—fancy enough to impress, easy enough for a weeknight win. Whether you’re celebrating a milestone trying something bright like this lemon blueberry cheesecake, treating your family, or sneaking a well-earned slice after the kids are in bed, this creamy masterpiece fits the moment.
And let’s be honest, the fact that it tastes like something straight from a cozy downtown café without ever leaving your kitchen? That’s the kind of everyday magic we all deserve a little more of.
So the next time life calls for something sweet, satisfying, and a little bit special, you know where to turn. Your very own cheesecake bistro moment is just a few ingredients—and a little fridge time—away.
❓ Frequently Asked Questions About This Cheesecake Bistro Recipe
Is it okay to swap in light cream cheese instead of the regular kind?
You can, but be warned—it won’t have that rich, creamy texture that makes this cheesecake bistro so irresistible. Full-fat gives it that classic bistro-worthy finish.
What if I don’t have a springform pan?
A deep pie plate or a square pan works too, though getting neat slices out might be a bit more challenging. The springform pan really brings that polished cheesecake bistro look.
How do I store leftovers?
Leftovers? Lucky you! Just cover your cheesecake tightly or transfer slices to airtight containers. Keep it chilled in the refrigerator for up to five days, or tuck it into the freezer where it’ll last around two months. Your cheesecake bistro moment can live on all week!
Can I add toppings to this cheesecake?
Absolutely! This cheesecake is a perfect blank canvas. Fresh berries, chocolate drizzle, crushed cookies—whatever makes your cheesecake bistro feel extra special.
Is a water bath really necessary?
It’s optional, but it does help with that smooth, crack-free top you see in professional cheesecake bistro slices. You can also just place a pan of hot water on the rack below if you’re not up for wrapping.
Can I make this ahead of time?
Yes, and you should! Cheesecake actually tastes better after chilling overnight. Make it the day before your event and bask in the glory of being ahead of schedule.
Can I turn this into mini cheesecakes?
Totally! Simply spoon the crust and filling into cupcake liners placed in a muffin pan, dividing the mixture evenly. Bake for about 18–22 minutes. Cheesecake bistro vibes, party-size!

