Let’s be honest—when life is full-on go go go, dessert often takes a back seat. But what if I told you that you could whip up a show-stopping oreo cheesecake that feels indulgent and stress-free? Whether you’re juggling kids, conference calls, or just trying to sneak a little “me time” between laundry loads, this is the kind of recipe that meets you right where you are.
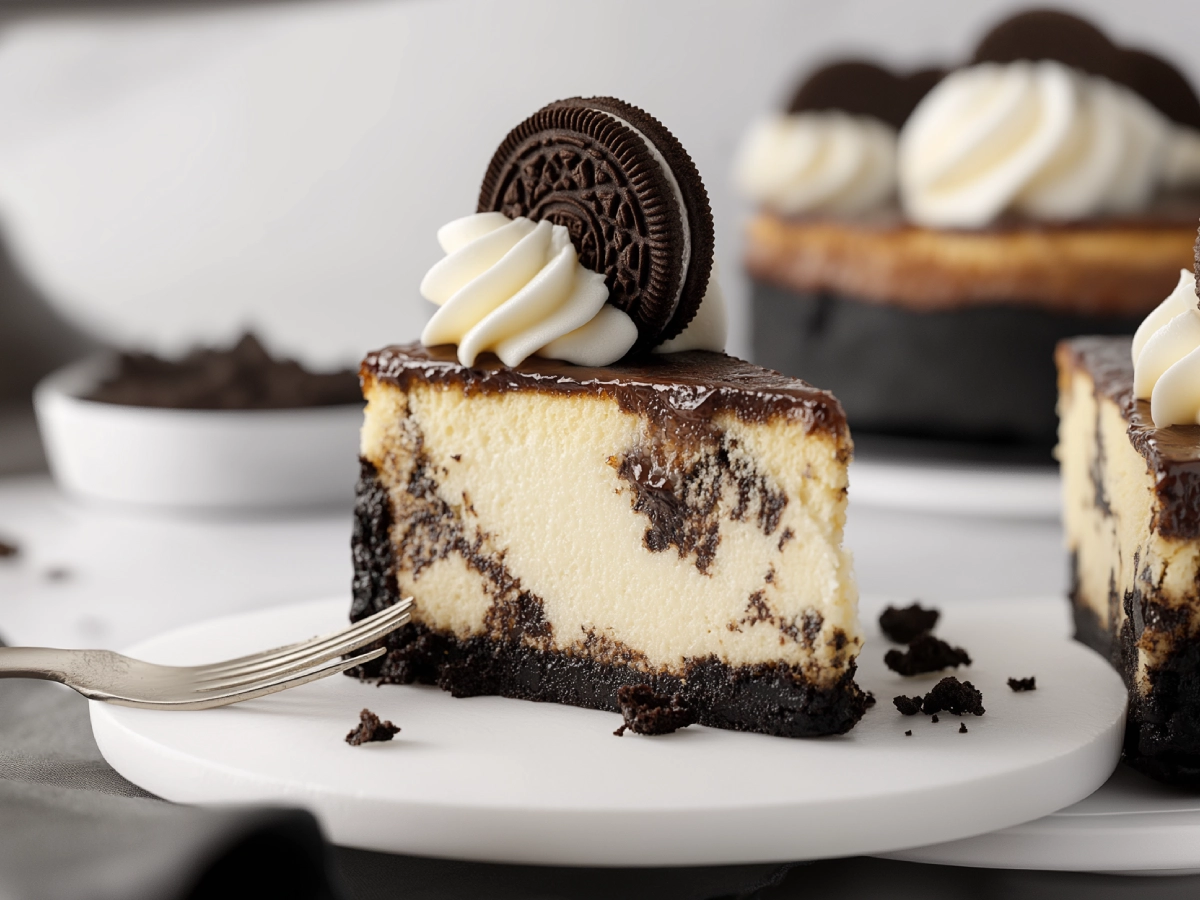
This oreo cheesecake is everything your tastebuds crave: rich, creamy, chocolatey, and with just enough crunch from everyone’s favorite sandwich cookie. It’s the kind of dessert that doesn’t just satisfy a sweet tooth—it brings a little joy back into your kitchen. And don’t worry, you don’t need to be a pastry chef to pull this off.
With easy-to-follow steps, minimal prep, and ingredients you likely have on hand (hello, Oreos and cream cheese!), this Oreo Cheesecake is practically foolproof. Whether it’s for a birthday, a potluck, or just a treat-yourself Tuesday, this Oreo Cheesecake recipe, and if you love cupcakes these Oreo Cupcakes are a delightful twist on the classic cookie, delivers big flavor with low effort.
So go ahead—grab those cookies, take a breath, and let’s make dessert feel doable again. You’ve got this.
Contents
- 1 Why You’ll Love This Oreo Cheesecake
- 2 Equipment
- 3 What You’ll Need for This Oreo Cheesecake
- 4 Let’s Make This Oreo Cheesecake: Step-by-Step
- 5 Cooking Tips
- 6 A Little Backstory
- 7 Storage Tips: Keeping Your Oreo Cheesecake Fresh and Fabulous
- 8 Nutrition Breakdown: What’s Inside This Creamy Delight?
- 9 Timing is Everything: Your Oreo Cheesecake Schedule
- 10 Frequently Asked Questions
- 10.1 Can I use low-fat cream cheese for this oreo cheesecake?
- 10.2 Can I make this oreo cheesecake recipe ahead of time?
- 10.3 How should I store Oreo Cheesecake?
- 10.4 What’s the best way to cut this Oreo Cheesecake recipe cleanly?
- 10.5 Can I use different flavors of Oreo cookies?
- 10.6 Is this oreo cheesecake kid-friendly?
Why You’ll Love This Oreo Cheesecake
- It’s simple enough for beginners, but fancy enough to impress.
- It hits that nostalgic sweet spot—who doesn’t love Oreos?
- The texture? Silky smooth with just the right cookie crunch.
- It holds up well in the fridge (if it even lasts that long).
Equipment
Before we start transforming your kitchen into cheesecake heaven, let’s round up the tools you’ll need:
- 9-inch springform pan (because no one wants cheesecake stuck to the pan)
- Food processor or a sturdy ziplock bag + rolling pin (Oreo-crushing magic!)
- Mixing bowls (large and medium)
- Electric hand mixer or stand mixer (unless you’ve got arms of steel)
- Rubber spatula
- Whisk
- Measuring cups and spoons
- Saucepan (for that glorious ganache)
- Cooling rack
- Piping bag and tip (if you’re feeling fancy with the whipped cream)
What You’ll Need for This Oreo Cheesecake
For the Crust:
- 24 Oreo cookies, whole (yes, with the creamy filling!)
- 4 tablespoons (57g) unsalted butter, melted
For the Oreo Cheesecake Filling:
- Four 8-ounce blocks (907g) cream cheese, completely softened
- 1 cup (200g) granulated sugar
- 5 large eggs, at room temperature
- ½ cup (119g) sour cream, room temperature works best
- 1 ½ tablespoons vanilla extract
- 20 Oreo cookies, quartered (for that dreamy cookie bite in every forkful)
For the Ganache Topping:
- 1 cup (170g) semisweet chocolate chips
- ½ cup (119g) heavy cream
For the Whipped Cream (Totally Optional but Delicious):
- 1 cup (237g) heavy cream, cold
- 2 tablespoons powdered sugar
- 1 teaspoon vanilla extract
Let’s Make This Oreo Cheesecake: Step-by-Step
Step 1: Prepping the Crust
Start by preheating your oven to 325°F (163°C). Now, get ready to work some cookie magic.
Take 24 of those Oreo cookies (filling and all) and toss them into a food processor. To get started, pulse the cookies in a blender or food processor until they turn into a fine, sand-like mixture with a rich chocolate aroma. No processor? No problem—just place the cookies in a sturdy zip-top bag and crush them with a rolling pin. It’s actually a soothing step that brings a little therapeutic joy to your prep time.
Next, pour those crushed crumbs into a large bowl and mix in the melted butter, stirring well until everything takes on the texture of damp sand at the beach. Press this buttery mixture firmly into the base of your springform pan, using the flat bottom of a glass or a measuring cup to press it down smoothly and evenly.
Finally, place the pan in a preheated oven and let the crust bake for around 10 minutes, just enough for it to firm up and become beautifully fragrant.
Pop the crust into the oven and bake it Between 10 to 12 minutes. This gives it a bit of structure, so it doesn’t go mushy once the filling hits. Once it’s done, let it cool while you move on to the main event.
Step 2: Making the Creamy Filling
Alright, let’s bring on the cream cheese! You’ll need all 32 ounces of it, so make sure it’s softened and ready to mix. Place the mixture into the bowl of your stand mixer, then turn it on to a medium speed setting.
Let it mix steadily for a few minutes, allowing everything to blend together beautifully until the texture is silky, creamy, and completely free of any little lumps or uneven bits. No lumps allowed in our dreamy oreo cheesecake.
Add in the sugar and mix again until everything is velvety. Now, crack in the eggs—one at a time. This helps the batter stay smooth and not curdled. Don’t rush it. Think of it like building flavor, one egg at a time.
After the eggs have been fully incorporated into the mixture, gently pour in the sour cream along with a splash of vanilla extract, allowing them to blend smoothly with the rest of the ingredients. Beat until just combined. Then grab those 20 Oreo cookies, quartered, and gently fold them in with a spatula. This is where things get good.
Pour the filling over your cooled crust and give the pan a gentle shake to even things out. You might even tap it on the counter a couple of times to release any air bubbles (bubbles are fun in soda, not cheesecake).
Step 3: Baking Without Cracks (No Drama Here)
Now for the baking. Wrap the outside of your springform pan with foil to avoid water leaks, then place it in a larger roasting pan. Carefully pour hot water into the base of the larger roasting pan, making sure the level rises until it reaches about halfway up the outer sides of the pan that holds your cheesecake—this gentle water bath helps ensure even baking without cracks.
This water bath (a.k.a. bain-marie, if you’re feeling fancy) is the secret to a creamy, crack-free cheesecake. Slide the whole setup into the oven and bake for about 1 hour and 15 minutes. The edges should be set, but the center can have a little jiggle—like a wobbly dance move.
Once baked, turn off the oven, crack the door, and let the Oreo Cheesecake hang out for an hour. This gradual cool-down helps prevent cracking. Then move it to the counter, and once it’s room temperature, into the fridge it goes. Chill at least 4 hours, but overnight is best if you can wait.
Step 4: Ganache, Please
After the Oreo Cheesecake has chilled and firmed up, let’s glam it up.
Grab a small saucepan and place it over medium heat. Gently heat the heavy cream until you notice tiny bubbles starting to form around the edges — you don’t want it to boil, just warm it enough to melt chocolate.
Once it’s ready, carefully pour the warm cream over a bowl filled with semisweet chocolate chips. Give the mixture a quiet moment—around 60 seconds—so the warmth can slowly begin to melt the chocolate, making it easier to stir into a smooth, rich blend. Then, take a whisk and slowly stir it all together until you have a glossy, velvety chocolate sauce that’s rich enough to make any dessert lover swoon.

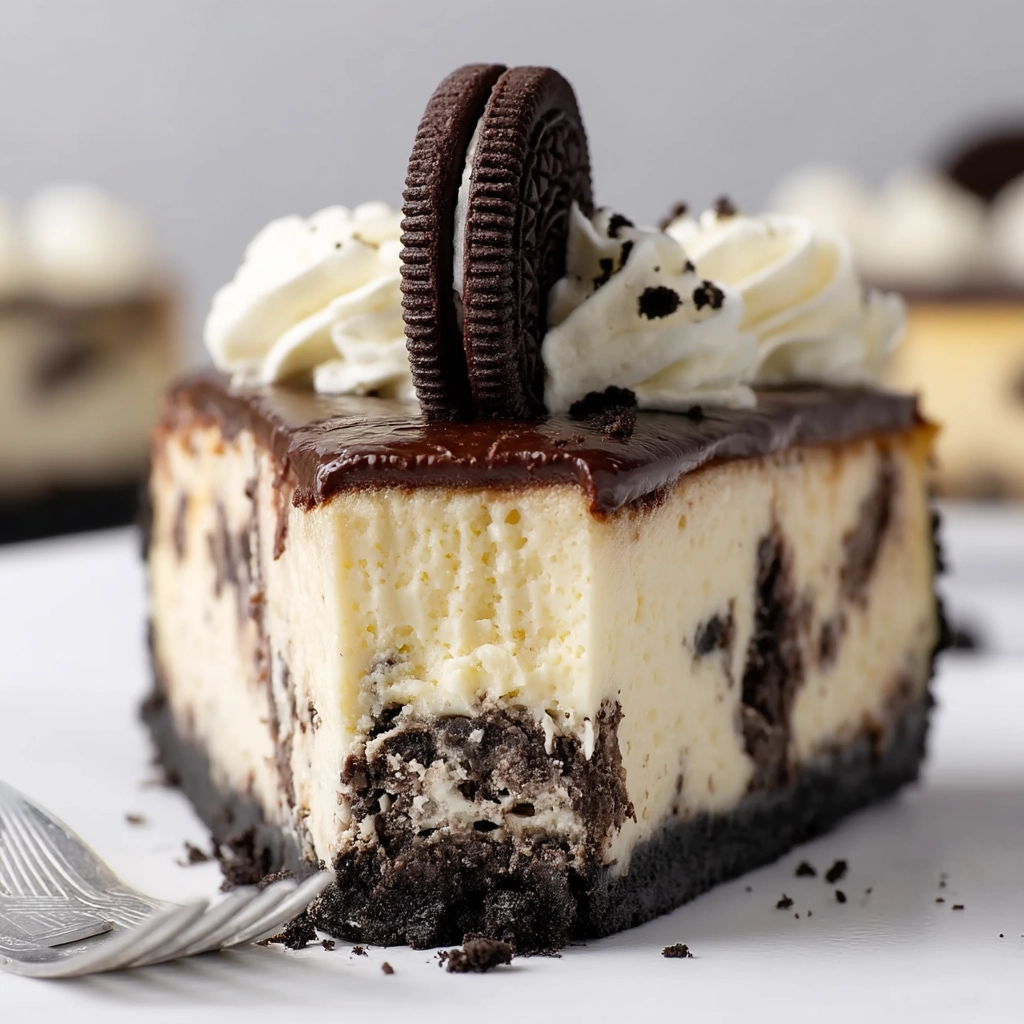
Gently drizzle the glossy chocolate mixture on top of your cheesecake, then slowly spread it out toward the edges with a spoon or small spatula to create a smooth, even layer. Watch as it flows smoothly and spills gently down the sides like an irresistible chocolate waterfall.
Step 5: Optional but Oh-So-Worth-It Whipped Cream
If you want to go the extra mile (and really, why not?), whip up some cream. Use an electric mixer to beat the cold cream, powdered sugar, and vanilla extract until soft peaks form.
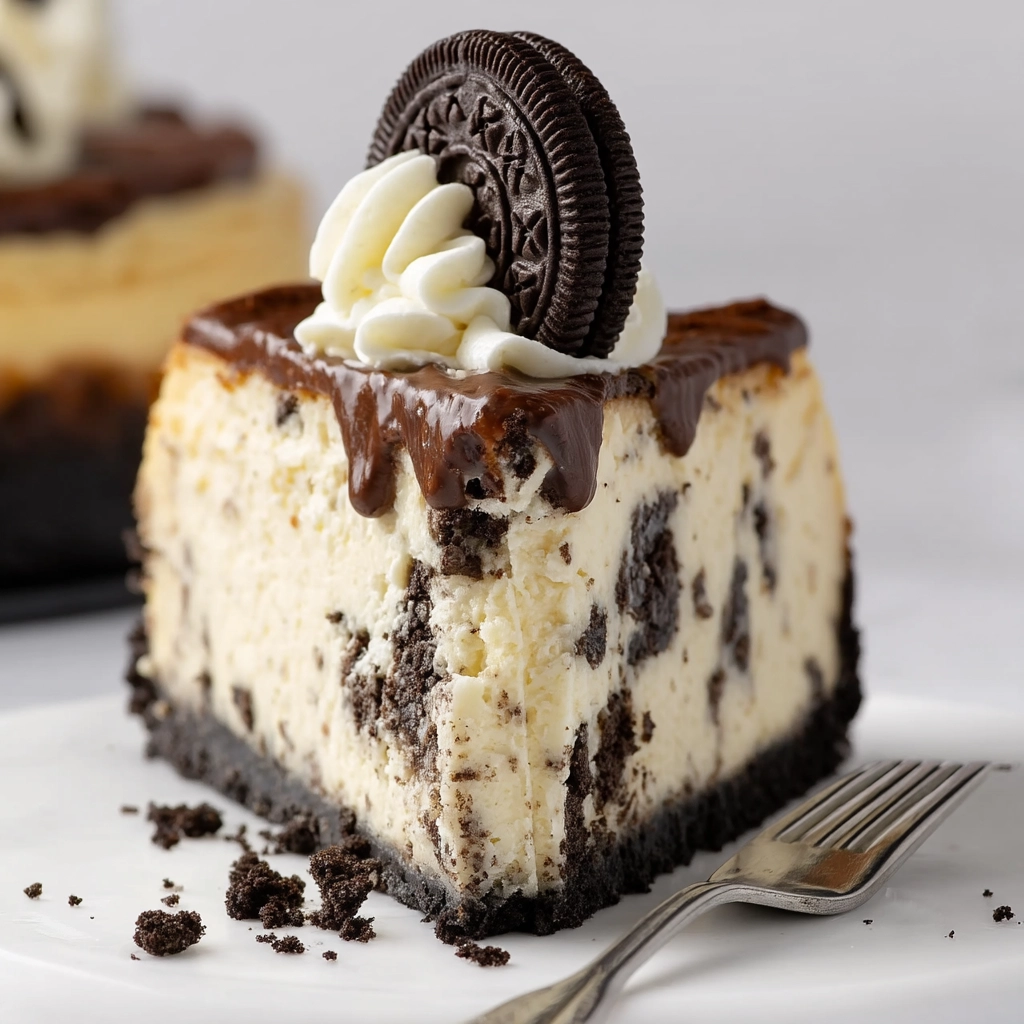
Pipe it around the edges or pile it right in the center. A few more crumbled Oreos on top? Yes, please.
Cooking Tips
- Room temp cream cheese is non-negotiable. Cold cream cheese is lumpy cream cheese, and nobody wants that drama in their batter.
- Don’t skip the water bath. It’s the cheesecake’s version of a spa day—keeps it relaxed and crack-free.
- Use full-fat everything. This isn’t diet food, and that’s totally okay. Go all in or go home!
- Want to speed up chilling? Pop it in the freezer for 90 minutes before slicing, but only if you’re in a cheesecake emergency.
A Little Backstory
This oreo cheesecake became a family favorite after one particularly chaotic Thanksgiving when the pumpkin pie mysteriously vanished (don’t ask). I whipped this up last-minute, and it was love at first bite. Now, it’s a staple at every birthday, barbecue, and yes, even breakfast once or twice (no judgment, right?).
Storage Tips: Keeping Your Oreo Cheesecake Fresh and Fabulous
You’ve poured your heart (and a whole lotta cookies) into making this Oreo Cheesecake — so let’s make sure it stays delicious!
Refrigerator Storage:
Once your Oreo Cheesecake has cooled and you’ve added that luscious ganache (and whipped cream, if you went all in), it needs to chill—literally. Store it in the fridge, lightly covered with plastic wrap or foil. A cake carrier also works wonders. It will keep well for up to 5 days, but honestly, it’s usually gone long before that in most households!
Freezer Friendly:
Want to save a few slices for a rainy day (or a “mom needs a moment” day)? No problem. Freeze individual slices or the whole cake—minus the whipped cream—for best texture. Wrap each slice tightly in plastic wrap and then in foil, or place them in an airtight freezer-safe container. Freeze for up to 2 months. When ready to eat, just move a slice to the fridge and let it thaw overnight. The texture stays creamy and the flavor? Still dreamy.
A Few More Tips:
- Don’t store it at room temperature—it’s a dairy-packed dessert and needs to stay chilled.
- If you topped it with whipped cream, wait to add it until serving if you’re planning to freeze leftovers.
- Cheesecake is actually easier to slice when it’s cold, so slice straight from the fridge and let it sit for 10 minutes before serving.
Nutrition Breakdown: What’s Inside This Creamy Delight?
Let’s be real—oreo cheesecake isn’t a low-cal salad. But knowing what you’re eating helps you balance your day. This dessert is rich, satisfying, and packs in flavor (and a fair bit of indulgence).
Each slice offers a good dose of calcium and protein thanks to the cream cheese and eggs. But, yes, it’s also high in sugar and saturated fat—this is your treat meal, not your everyday snack. Think of it as your well-earned reward after a long week.
If you’re mindful of portions, try slicing it into 12 to 16 pieces instead of 8. You’ll still get that rich taste with a more manageable calorie count.
Nutritional Information (Per Serving – 1 Slice of 12)
| Nutrient | Amount |
|---|---|
| Serving Size | 1 slice (1/12th of Oreo Cheesecake) |
| Calories | 560 kcal |
| Total Fat | 40g |
| Saturated Fat | 22g |
| Unsaturated Fat | 13g |
| Trans Fat | 0.5g |
| Cholesterol | 140mg |
| Sodium | 370mg |
| Total Carbohydrates | 45g |
| Fiber | 1g |
| Sugars | 32g |
| Protein | 7g |
| Calcium | 140mg (11% DV) |
| Iron | 2mg (10% DV) |
| Potassium | 160mg (5% DV) |
| Vitamin A | 700 IU (14% DV) |
| Vitamin D | 0.6µg (3% DV) |
Timing is Everything: Your Oreo Cheesecake Schedule
We all know the best things in life take time—oreo cheesecake included. But don’t worry, none of it is hard. You’ll mostly be waiting while this beauty chills and firms up to that dreamy, sliceable perfection.
Here’s your no-stress time breakdown:
- Prep Time: 25 minutes
(This includes crushing cookies, mixing the batter, and prepping your pan—feel free to play your favorite playlist during this part.) - Cook Time: 1 hour and 15 minutes
(Let the oven do the heavy lifting while you kick back with a cup of coffee.) - Chilling Time: Minimum 4 hours (overnight is even better)
(Yes, it’s a test of patience. But trust me, it’s worth every second.) - Ganache & Whipped Cream Topping Time: 15 minutes
(That final flourish that makes your Oreo Cheesecake Instagram-ready!) - Total Time: About 5 or 6 to 7 hours (chilling and cooling)
(But hands-on? Just around 40 minutes. Totally manageable on a weekend—or a weeknight if you’re feeling fancy.)
Yield
- Servings: 12 generous slices
- Alternative Yield: Slice it smaller for 16 pieces if you’re feeding a crowd or watching portions.
Cuisine
- Cuisine Style: American
(With a twist of childhood nostalgia and a big helping of cookie-filled goodness.)
So there you have it—your new favorite dessert that hits all the right notes. Whether you’re baking to impress, decompress, or just indulge in a little self-care, this oreo cheesecake delivers in every creamy, chocolatey bite. This is the kind of dessert that brings instant comfort—like wrapping yourself in a cozy blanket after a long day.
You don’t need fancy skills or endless hours in the kitchen to pull this off. Just a few pantry staples, a bit of patience, and the willingness to sneak a cookie (or three) while you prep. Why not treat yourself and try making this creamy Oreo cheesecake? After all your hard work, you deserve a sweet moment—maybe even two!
Frequently Asked Questions
Can I use low-fat cream cheese for this oreo cheesecake?
You can, but I’ll be honest—full-fat gives that rich, creamy texture we all crave. If you’re watching calories, just remember that Oreo Cheesecake is a treat. Go full flavor or go home!
Can I make this oreo cheesecake recipe ahead of time?
Yes! This dessert is actually better when made ahead. Chill it overnight so the flavors meld and the texture sets up beautifully. It’s perfect for prepping before a big event or busy day.
How should I store Oreo Cheesecake?
Leftover oreo cheesecake keeps like a dream. Store it in the fridge for up to 5 days, lightly covered. You can also freeze individual slices for up to 2 months—just thaw in the fridge overnight.
What’s the best way to cut this Oreo Cheesecake recipe cleanly?
To get clean, neat slices, warm your knife under hot water, dry it off, and then cut through the cheesecake. Give the knife a rinse and wipe after each slice—this simple step helps keep every piece looking beautifully smooth.
Absolutely! Mint, peanut butter, golden—go wild. Be sure to stick with the classic Oreo cookies, not the ones with extra filling, so your crust turns out firm and holds together nicely.
Is this oreo cheesecake kid-friendly?
Definitely! It’s a hit with kids and grown-ups alike. Just be prepared for it to disappear faster than you expect—especially if little hands are involved.
