There’s something undeniably nostalgic about the scent of a freshly baked Pineapple Pie wafting through the kitchen. For me, it brings back warm memories of summers spent in my Nonna’s sun-drenched Sicilian kitchen, where ripe tropical fruits met old-world pastry traditions. One pie, in particular, always stood out: her homemade pineapple pie. Sweet, tangy, and wrapped in a golden, buttery crust, it was a tropical escape in every bite—a dish that beautifully blended my Italian roots with a taste of the tropics.
Unlike traditional fruit pies that often lean heavily on berries or apples, pineapple pie delivers a unique balance of brightness and richness. The fruit’s natural acidity pairs beautifully with sugar and spices, creating a filling that’s both refreshing and indulgent. Whether served warm with a scoop of vanilla gelato or chilled for a light dessert on a hot day, pineapple pie has a place in every season.
This article will walk you through how to recreate this delightful dessert in your own kitchen, no matter your baking experience. We’ll cover everything from choosing the best pineapple—fresh or canned—to achieving that perfect, flaky pie crust. With a few simple steps and a touch of love, you’ll be serving up slices of sunshine that might just become a family favorite.
Get ready to fill your home with the scent of caramelized pineapple and buttery pastry—this pineapple pie recipe is about to become a staple in your dessert repertoire.
Contents
- 1 Equipment
- 2 Ingredients
- 3 How to Make Pineapple Pie: Step-by-Step Guide
- 4 Bonus Tips for Perfect Pineapple Pie
- 5 Make-Ahead and Storage
- 6 Variations and Serving Ideas
- 7 Why You’ll Love This Pineapple Pie
- 8 Cooking Tips and Tricks
- 9 Storage Tips
- 10 Cooking Time
- 11 Nutrition Information (Per Slice, based on 8 servings)
- 12 Conclusion
- 13 Frequently Asked Questions (FAQs)
Equipment
Before diving into this tropical treat, gather the essential tools to make your baking experience smooth and enjoyable:
- Mixing bowls (one large, one medium)
- Medium saucepan
- Whisk or wooden spoon
- Measuring cups and spoons
- Fine mesh strainer (optional, for canned pineapple)
- Rolling pin (if using homemade crust)
- 9-inch Pineapple Pie dish
- Oven mitts
- Cooling rack
- Silicone spatula
Having everything prepped and within reach will help you flow through the recipe with ease.
Ingredients
Here’s everything you’ll need to whip up a sweet and tangy pineapple pie:
- 2¼ cups crushed pineapple (or one 20 oz can, drained if packed in syrup)
- ½ cup granulated sugar – feel free to use unrefined sugar or erythritol for a low-sugar option
- ¼ teaspoon salt
- 4 tablespoons cornstarch – this helps thicken the filling to a luscious, sliceable consistency
- ½ cup shredded coconut (optional) – adds a tropical twist and subtle chew
- 8 oz cream cheese (optional) – for a creamy, tangy base layer that elevates the flavor
- 1 9-inch Pineapple Pie crust – use your favorite homemade dough or a quality store-bought crust
Feel free to customize these ingredients to your liking. The optional add-ins let you decide between a classic fruit pie or a creamier, more indulgent variation.
How to Make Pineapple Pie: Step-by-Step Guide
If you’re ready to bake a dessert that captures the essence of the tropics in every bite, you’re in the right place. This pineapple pie recipe is simple enough for beginners but impressive enough to serve guests at a summer gathering. Whether you’re sticking to the classic version or opting for the cream cheese and coconut enhancements, each step is laid out to help you achieve pie perfection.
Step 1: Prepare the Pineapple Filling
Start by making the heart of your Pineapple Pie—the pineapple filling.
Ingredients Needed:
- 2¼ cups crushed pineapple (or a 20 oz can)
- ½ cup sugar
- ¼ tsp salt
- 4 tbsp cornstarch
- Drain the pineapple if using canned. While some liquid is helpful, too much can make your Pineapple Pie soggy. Use a fine mesh strainer and press gently with a spoon to remove excess juice.
- In a medium saucepan, combine the pineapple, sugar, salt, and cornstarch.
- Turn the heat to medium and stir continuously. As it heats, the mixture will begin to bubble and thicken. This should take about 5–7 minutes.
- Once the filling reaches a jam-like consistency and no longer looks cloudy, remove it from the heat. Let it cool slightly—this makes it easier to handle and helps it set better in the Pineapple Pie.
Step 2: Optional – Create the Cream Cheese Layer
If you’re opting for a creamy twist, this step adds a luscious layer of tangy flavor beneath your pineapple.
Ingredients:
- 8 oz cream cheese, softened
- 1 tbsp sugar (optional)
- In a medium bowl, whip the cream cheese until smooth using a hand mixer or a fork.
- Taste it. If you’d like a slightly sweeter profile, add 1 tablespoon of sugar.
- Spread the mixture evenly onto the bottom of your unbaked pie crust. This layer not only adds flavor but also helps seal the crust, reducing sogginess.
Step 3: Optional – Add Shredded Coconut
For a more tropical flair, stir ½ cup of shredded coconut into your warm pineapple filling before assembling the Pineapple Pie. The coconut adds subtle texture and richness, perfectly complementing the pineapple’s brightness.
Step 4: Prepare Your Pineapple Pie Crust
A good pie starts with a good crust. You can use a store-bought crust, a ready-made frozen shell, or make your own. If going homemade, here’s a quick guide:
Basic Pineapple Pie Crust Ingredients:

- 1¼ cups all-purpose flour
- ½ tsp salt
- ½ cup cold unsalted butter, cubed
- 3–5 tbsp ice water
- In a large bowl, whisk the flour and salt together.
- Using a pastry cutter or your fingertips, work the cold butter into the flour until the mixture takes on a crumbly texture, similar to coarse breadcrumbs. Gradually drizzle in ice water, one tablespoon at a time, gently mixing just until the dough begins to hold together. It should be moist enough to form a ball, but never sticky or wet.
- Gradually add ice water, one tablespoon at a time, gently stirring until the dough just comes together
- Shape the dough into a disc, wrap it tightly in plastic wrap, and refrigerate for at least 30 minutes before rolling out.
- On a floured surface, roll the dough into a 12-inch circle, then transfer to your 9-inch pie dish. Trim and crimp the edges as desired.
Step 5: Assemble the Pie
Now comes the fun part—bringing everything together.
- If you’re including the cream cheese layer, be sure to spread it evenly over the bottom of the crust first.
- Spoon the pineapple filling over the cream cheese (or directly into the crust if you’re skipping the cream).
- Smooth the top with a spatula.
- Optional: For extra flair, sprinkle a bit more coconut on top or create a lattice crust with additional pastry.
Step 6: Bake the Pineapple Pie
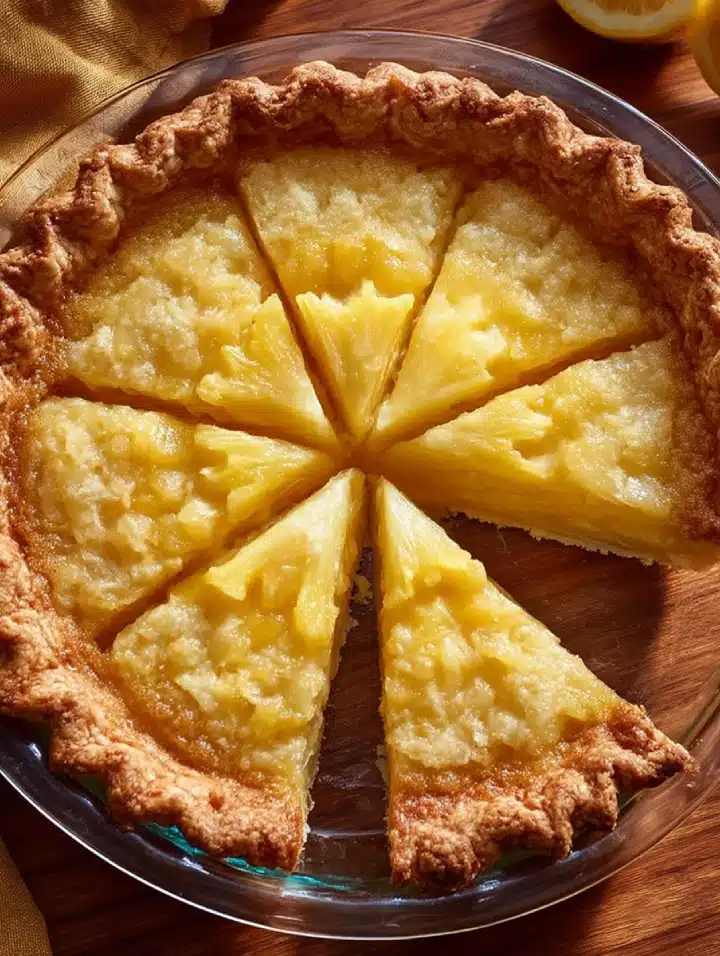
Slide it into the oven and allow it to bake until golden and perfectly done:
- Preheat your oven to 375°F (190°C).
- Place the Pineapple Pie on the center rack and bake for 30–35 minutes, or until the crust is golden and the filling is bubbling slightly.
- If the crust starts to brown too fast, protect the edges with foil or use a pie shield.
Step 7: Cool and Set
Cooling is crucial for the pie to slice cleanly and hold its shape.
- Transfer the pie to a cooling rack and let it rest for at least 2 hours at room temperature.
- For best results, refrigerate for another 1–2 hours to ensure the filling sets fully.
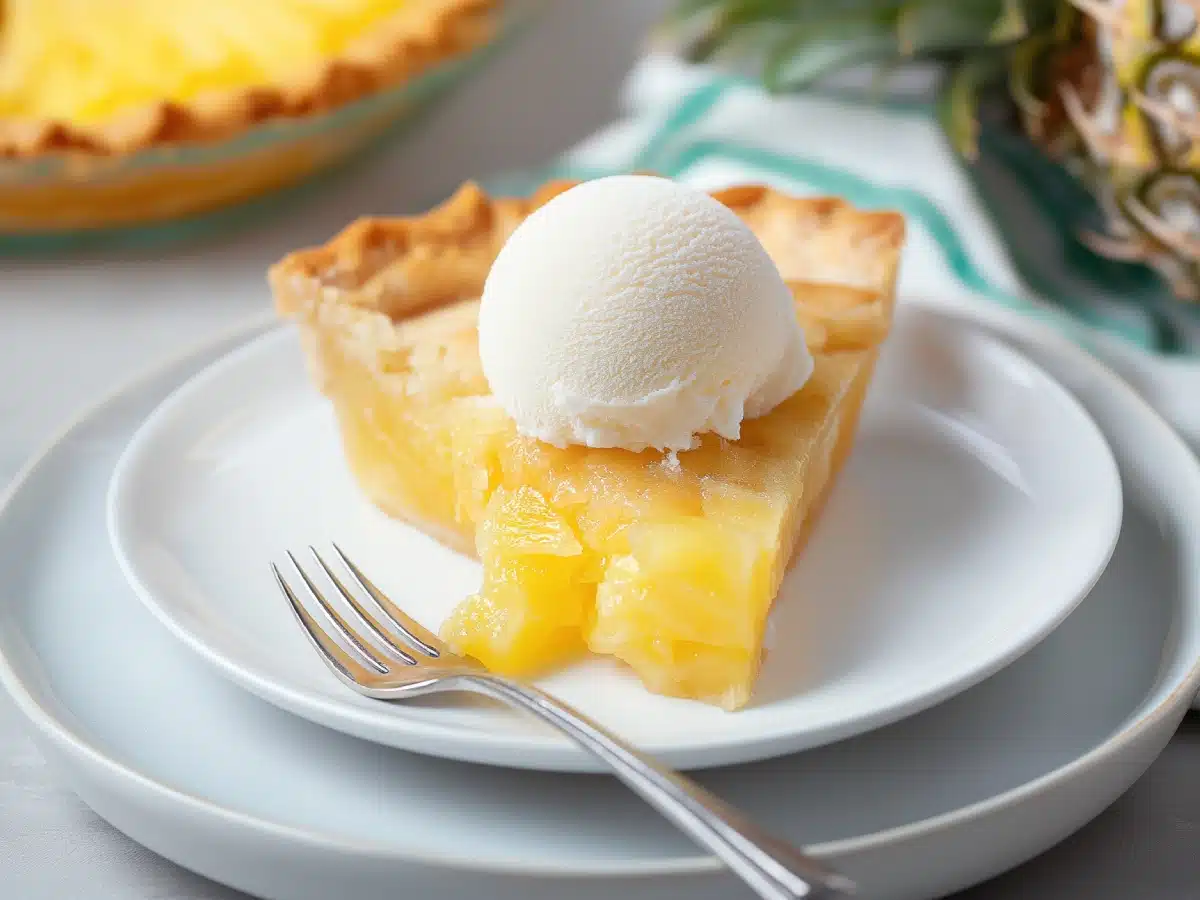
Step 8: Serve and Enjoy
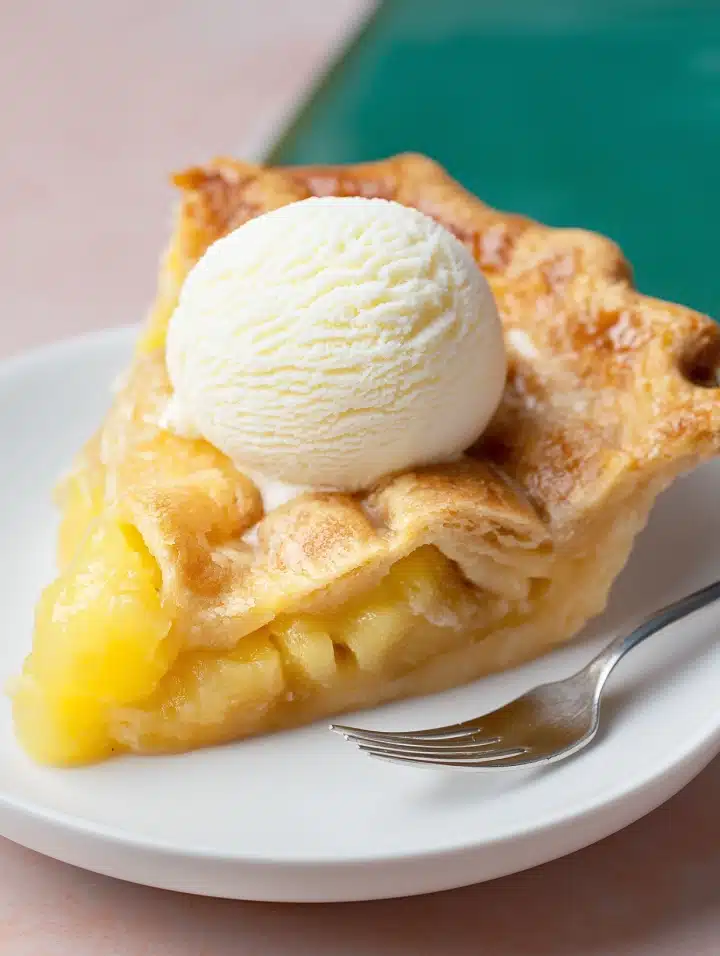
Your pineapple pie is now ready to serve! Here are a few suggestions for enjoying it:
- Chilled for a refreshing dessert on hot days
- Warm with a scoop of vanilla ice cream
- Topped with a dollop of whipped cream
- Garnished with fresh mint or a cherry for presentation
Bonus Tips for Perfect Pineapple Pie
Choosing Your Pineapple:
- If using fresh pineapple, peel, core, and finely chop it. You’ll need about 2¼ cups of fruit.
- If using canned, opt for crushed pineapple in juice—not syrup—for the best texture and balanced sweetness.
Thickening Tips:
- Always cook the filling until it thickens before adding it to the crust. This prevents soggy bottoms.
- Let it cool slightly to avoid melting your crust’s base, especially when using cream cheese.
Crust Variations:
- For a twist, try a graham cracker crust—especially if you’re making a no-bake version.
- For extra flavor and a beautiful shine, brush the crust with a beaten egg wash before baking.
Make-Ahead and Storage
Make-Ahead Tips:
- Prepare the pineapple filling a day in advance and refrigerate until ready to use.
- You can assemble the entire pie (without baking) and store it in the fridge for up to 24 hours.
Storage:
- Cover leftovers loosely with foil or plastic wrap.
- Refrigerate for up to 4 days.
- For longer storage, freeze it between one months to two months. Thaw overnight in the fridge before serving.
Variations and Serving Ideas
- Pineapple Cream Pie – Add the cream cheese layer and top with whipped cream for a lighter, mousse-like dessert.
- Toasted Coconut Topping – Toast coconut flakes and sprinkle them on top before serving.
- Mini Pineapple Pies – Bake in muffin tins for perfect single servings.
- No-Bake Version – Use a graham cracker crust and cook the filling fully before chilling to set.
Why You’ll Love This Pineapple Pie
This Pineapple Pie is everything a good dessert should be: easy, versatile, and absolutely delicious. The tropical tang of pineapple combined with a rich filling and flaky crust makes it a standout. It’s not just a summer dessert—it’s a celebration of flavor all year round.
Whether you’re sharing it at a potluck, serving it at a holiday table, or sneaking a slice with your morning coffee (no judgment here!), this pineapple pie is sure to bring smiles.
Cooking Tips and Tricks
1. Use Cold Ingredients for the Crust
If you’re making a homemade pie crust, ensure your butter and water are ice cold. This helps create that tender, flaky texture every pie deserves.
2. Don’t Skip the Thickening Step
Always cook your pineapple filling until it’s thick and glossy before pouring it into the crust. Skipping this step may result in a watery pie that won’t set properly.
3. Add Flavor Enhancers
A splash of vanilla extract, a pinch of nutmeg, or even lime zest can take the flavor of your pineapple pie to the next level without overpowering it.
4. Let It Cool
Cooling isn’t optional—it’s essential. Allow the pie to rest at room temperature and chill in the fridge to fully set the filling for clean, picture-perfect slices.
5. Use Pie Weights If Pre-Baking
If you’re blind baking your crust (pre-baking before adding filling), use pie weights or dried beans to prevent the crust from puffing up or shrinking.
Storage Tips
Proper storage keeps your pie fresh and flavorful:
Room Temperature
- Cool the pie completely before storing.
- If not using dairy (no cream cheese), you can leave it at room temperature for up to 24 hours, loosely covered.
Refrigeration
- With cream cheese or after 1 day at room temp, wrap the pie in plastic wrap or foil and store in the fridge for up to 4 days.
- Let slices come to room temperature for best flavor before serving.
Freezing
- Secure the pie by wrapping it snugly with a layer of plastic wrap followed by aluminum foil.
- Freeze for up to 2 months.
- Thaw overnight in the refrigerator and reheat lightly in the oven for that fresh-baked feel.
Cooking Time
Here’s a quick breakdown of the time you’ll need from start to finish:
| Stage | Time |
|---|---|
| Prep Time | 20 minutes |
| Filling Cooking Time | 5–7 minutes |
| Optional Crust Preparation | 30 minutes (chill time) |
| Assembly Time | 10 minutes |
| Baking Time | 30–35 minutes |
| Cooling & Setting Time | 2–4 hours |
Total Time (excluding crust chilling): ~3 hours (including cooling and setting)
Nutrition Information (Per Slice, based on 8 servings)
Keep in mind that these values are estimates and can vary based on the exact ingredients and serving sizes used.
| Nutrient | Amount |
|---|---|
| Calories | 280–320 kcal |
| Total Fat | 15g |
| Saturated Fat | 9g |
| Carbohydrates | 36g |
| Sugars | 20g |
| Dietary Fiber | 1g |
| Protein | 3–4g |
| Sodium | 180mg |
| Calcium | 4% DV |
| Vitamin C | 20% DV |
With cream cheese and coconut, values will lean toward the higher end., Provides detailed information on the nutritional benefits of pineapple, reinforcing its value in the recipe.
Conclusion
There’s something magical about baking a pie from scratch—especially one that infuses tropical charm into every bite. This pineapple pie recipe is proof that simple ingredients, when prepared with care, can create unforgettable flavor. Whether you’re channeling sunny summer days or adding a refreshing twist to your dessert table, this Pineapple Pie is the perfect crowd-pleaser.
With its golden, flaky crust, tangy-sweet pineapple filling, and optional creamy layers, this adaptable dessert is one you’ll revisit often. Make it uniquely yours by adding a tropical twist of coconut, a swirl of cream cheese, or a dash of warm spices.
So preheat that oven, roll out your dough, and let the scent of sweet pineapple pie fill your kitchen. From my family’s table to yours—buon appetito!
Frequently Asked Questions (FAQs)
Can I use fresh pineapple instead of canned?
Absolutely! Just make sure to finely chop it and cook it down as directed. You’ll need about 2¼ cups of chopped fruit. Be aware that fresh pineapple can have more juice, so drain or simmer it slightly longer.
Do I need to pre-bake the Pineapple Pie crust?
Not for this recipe, unless you’re using a particularly soft or buttery crust that needs reinforcement. However, if you’re adding cream cheese, blind baking can help avoid a soggy bottom.
Can I make this Pineapple Pie gluten-free?
Yes, just substitute the Pineapple Pie crust with a gluten-free crust and make sure your cornstarch and other ingredients are certified gluten-free.
Can I make this Pineapple Pie vegan?
To make it vegan, skip the cream cheese or use a plant-based version, and opt for a vegan pie crust. Also, ensure your sugar is vegan-certified if that’s important to you.
How do I know when the Pineapple Pie is done baking?
The crust should be a rich golden brown, and the filling should be gently bubbling. If the top starts to brown too fast, cover it with foil halfway through baking.
