There’s something a little magical about red velvet cheesecake. Maybe it’s the rich, velvety swirl of flavors, or maybe it’s the way it makes a regular Tuesday feel like a celebration. Either way, if you’ve been hunting for a dessert that walks the line between classic comfort and impressive elegance, you’ve just found it.
Whether you’re a working mom juggling emails and after-school activities or a passionate home baker with a flair for treats, this recipe fits right into your rhythm. It’s the kind of dessert that looks like you spent hours crafting it—spoiler alert: you didn’t.
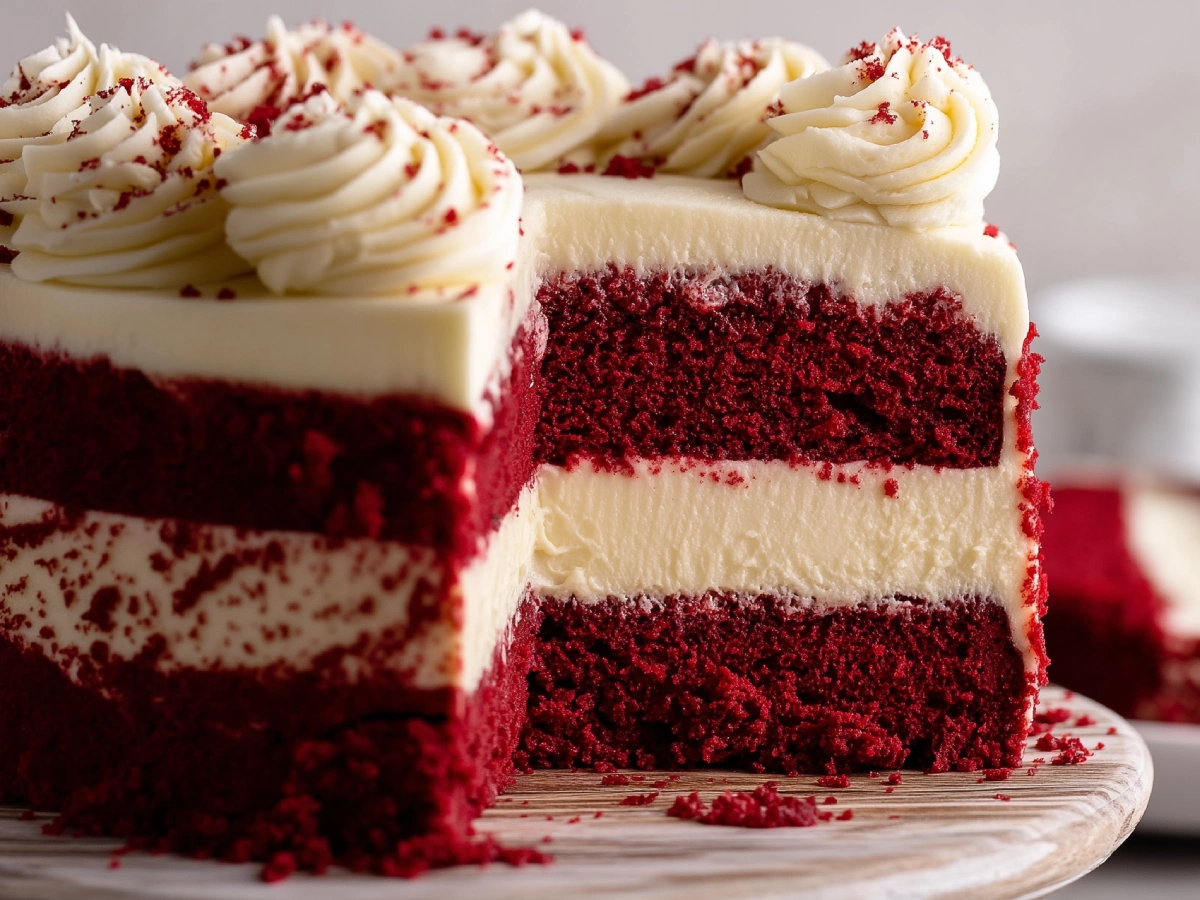
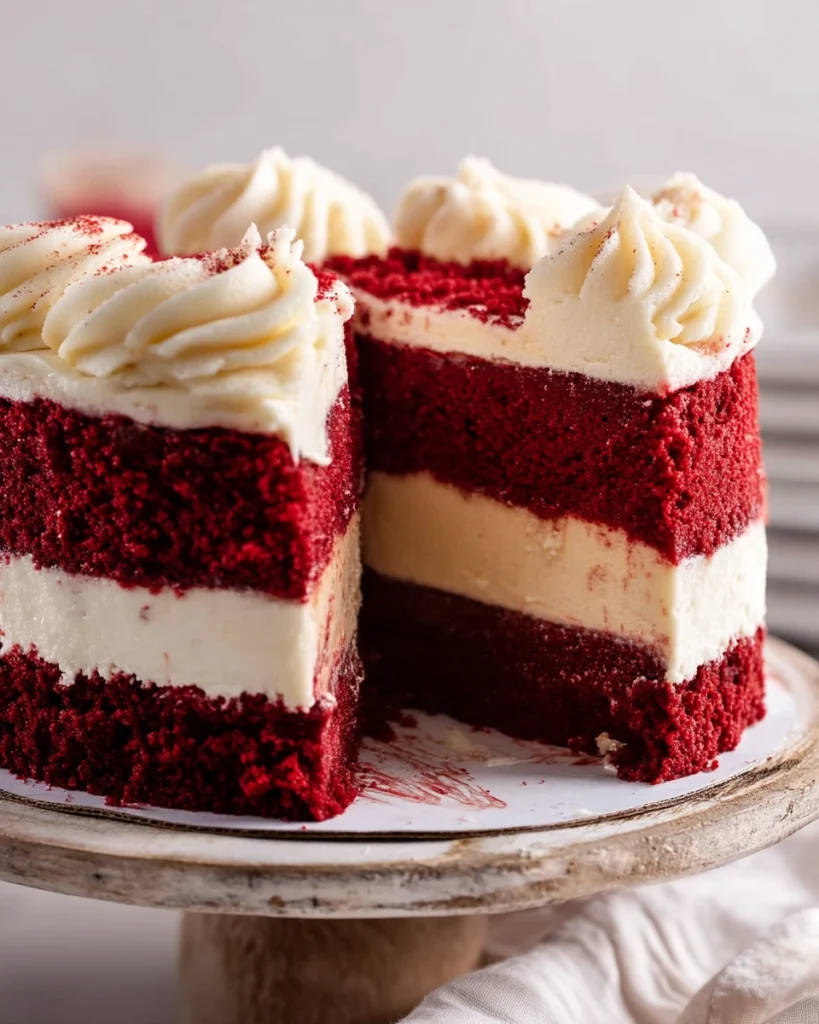
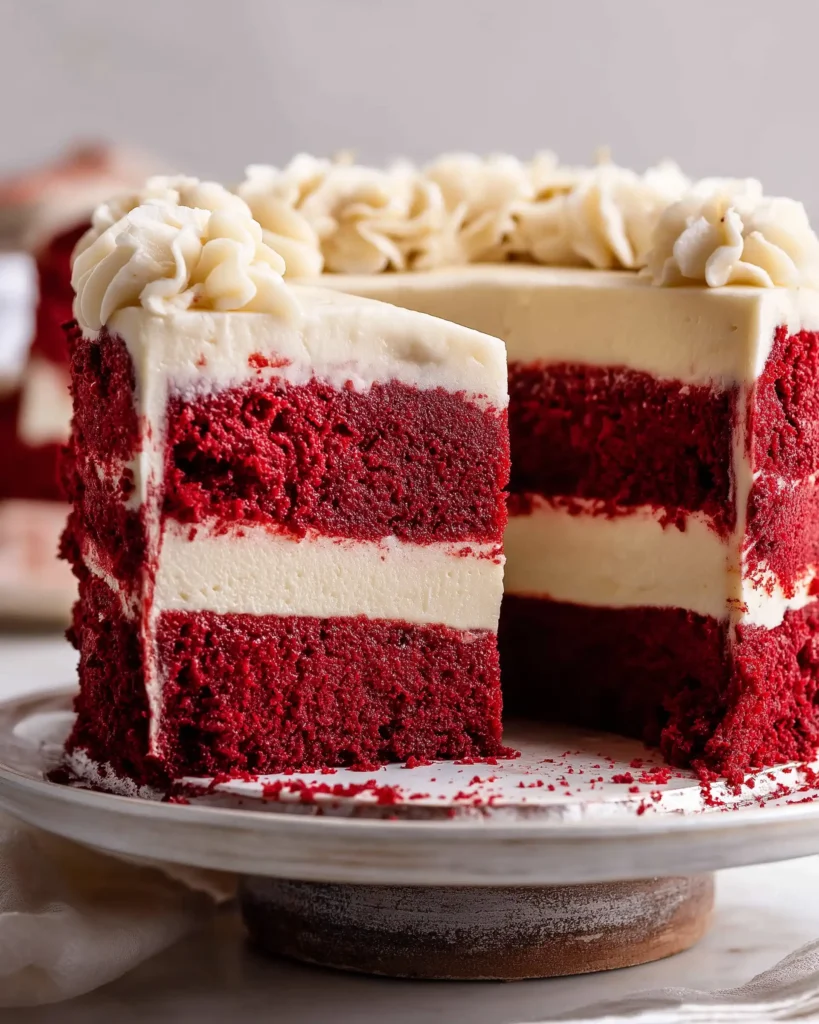
And the best part? It’s a triple-layered dream—cheesecake, red velvet cake, For those seeking a gluten-free option, these gluten-free red velvet cupcakes are a delightful alternative and a generous cloud of cream cheese frosting. You’ll want to hide a slice in the back of the fridge.
This red velvet cheesecake isn’t just a treat—it’s a moment. The kind of moment when your family gathers around the table with wide eyes, or your friends ask, “You made this?” It brings the “wow” without the worry.
Let’s dive into the delicious details and whip up something beautiful—and did I mention delicious?
Contents
- 1 Why You’ll Love This Red Velvet Cheesecake
- 2 Ingredients You’ll Need
- 3 Equipment
- 4 Step-by-Step Instructions: How to Make Red Velvet Cheesecake
- 5 Cooking Tips
- 6 A Slice of My Story
- 7 Storage Tips for Your Red Velvet Cheesecake
- 8 Nutrition Breakdown: What’s in a Slice? (Approximate Values per Serving)
- 9 Cooking Time & Recipe Yield
- 10 Frequently Asked Questions
Why You’ll Love This Red Velvet Cheesecake
- Layers of tangy cheesecake and moist red velvet cake wrapped in creamy frosting—yes, please.
- Feels fancy, but the steps are simple and stress-free.
Ingredients You’ll Need
For the Creamy Cheesecake Center:
- 16 oz cream cheese (room temp)
- ½ cup granulated sugar
- 1 tbsp all-purpose flour
- A pinch of salt
- ¼ cup heavy cream
- ½ tsp vanilla extract
- 2 eggs (room temp)
For That Signature Red Velvet Cake:
- ½ cup unsalted butter (softened)
- 1½ cups granulated sugar
- 2 eggs
- ¼ cup + 1 tbsp unsweetened cocoa powder
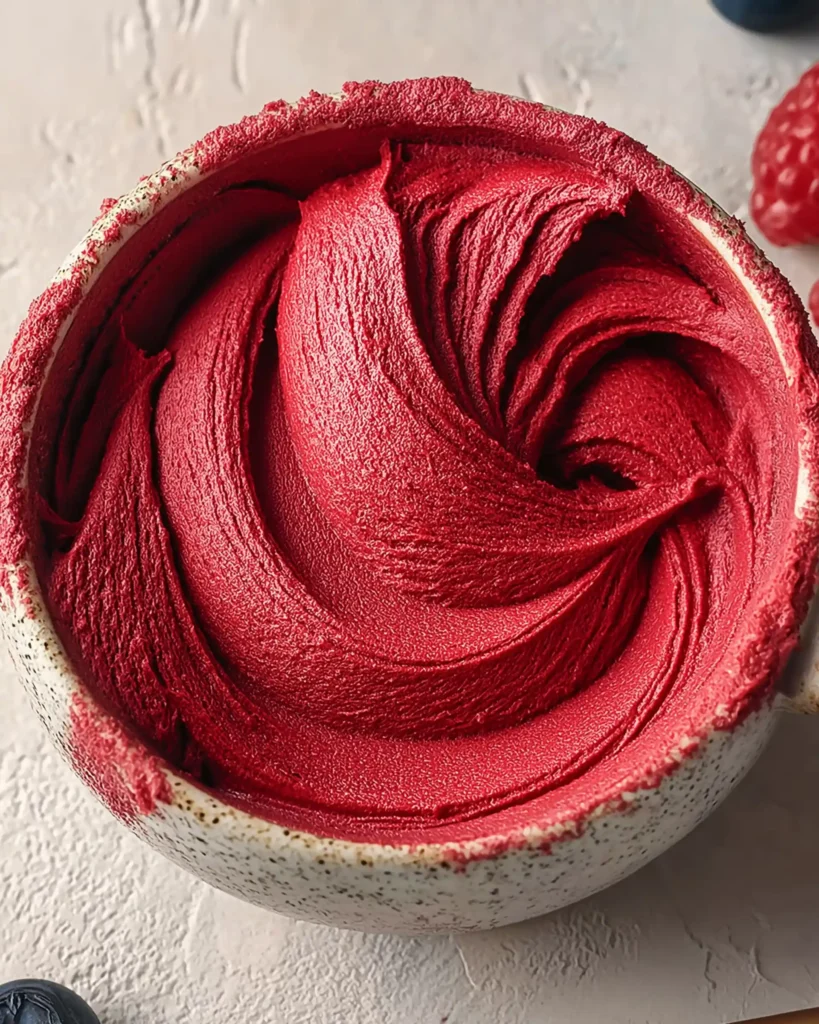
- 6 tbsp red food coloring
- 1 tsp vanilla extract
- 1 cup buttermilk
- 2¼ cups all-purpose flour
- 1 tsp baking soda
- 1 tsp salt
- 1 tbsp white vinegar
For The Cream Cheese Frosting That’ll Steal the Show:
- 1 cup unsalted butter (room temp)
- 4 cups powdered sugar
- 2 tsp vanilla extract
- A pinch of salt
- 16 oz cream cheese (cold, cut into chunks)
Equipment
Before we roll up our sleeves, let’s make sure the kitchen is ready for baking magic. Here’s what you’ll need to make this red velvet cheesecake from start to sweet finish:
- 9-inch springform pan (trust me, it makes life easier when it’s time to remove the Red Velvet Cheesecake)
- Mixing bowls (you’ll need at least two medium ones and a large one)
- Electric hand mixer or stand mixer (unless you’ve got super strong arms and time to burn)
- Rubber spatula (for every last bit of batter)
- Wire cooling rack
- Measuring cups and spoons
- Sifter (optional, but helpful for smooth cocoa and flour)
- Parchment paper
- Baking sheet (to catch any drips—your oven will thank you)
- Offset spatula or butter knife (for frosting and swooping it like a pro)
Step-by-Step Instructions: How to Make Red Velvet Cheesecake
Let’s start layering the love. Follow these steps, and you’ll be serving up a slice of heaven that combines cheesecake and red velvet cake like they were always meant to be together.
1. Prepare the Red Velvet Cheesecake Layer
Let’s build the heart of this dessert first: that luscious, creamy cheesecake.
- In a large mixing bowl, beat the cream cheese until it’s smooth and dreamy. No lumps allowed.
- Add in the sugar, flour, and just a pinch of salt. Beat until fully combined.
- Pour in the heavy cream and vanilla extract, then mix again until it all comes together.
- Crack in those two room temperature eggs, one at a time. Beat gently after each addition until just mixed—don’t overmix here, or the texture might suffer.
- Pour the batter into your greased and parchment-lined springform pan, smoothing the top with a spatula.
- Tap the pan gently on the counter to release any sneaky air bubbles.
- Bake at 325°F (163°C) between 34 to 42 minutes, or until the center is just slightly wobbly.
- When it finish and done, let it cool completely on a wire rack, then cover and chill it in the fridge between four to five hours or overnight.
Pro Tip: Making the Red Velvet Cheesecake layer ahead of time is your best move—one less thing to juggle when you’re frosting and stacking.
2. Make the Red Velvet Cake
As the Red Velvet Cheesecake firms up in the fridge, it’s time to prepare the signature layer that makes this dessert so eye-catching and delicious.
- Start by heating your oven to 350°F (177°C). Lightly grease two 9-inch round cake tins and cover the bottoms with parchment paper.
- In a big mixing bowl, beat the butter and sugar until it’s fluffy and creamy. Don’t rush this step — it’s the foundation for a soft, tender cake.
- Add in the eggs, one at a time, beating well after each addition.
- In a small bowl, mix the cocoa powder, red food coloring, and vanilla extract to make a thick paste. Stir it into the butter mixture. Yes, it looks wild—that’s the point.
- In another bowl, combine the flour and salt.
- Gradually mix the dry ingredients and buttermilk into the butter mixture, switching between the two a little at a time. Begin and end with flour. Stir just until combined—no overmixing here!
- In a small cup, mix the baking soda and vinegar (it’ll bubble like a science project), then quickly fold it into the batter.
- Divide the batter evenly between the pans and bake for 30–35 minutes, or until a toothpick comes out clean.
- Let the cakes cool in their pans for 10 minutes, then transfer to a rack to cool completely.
3. Whip Up the Frosting
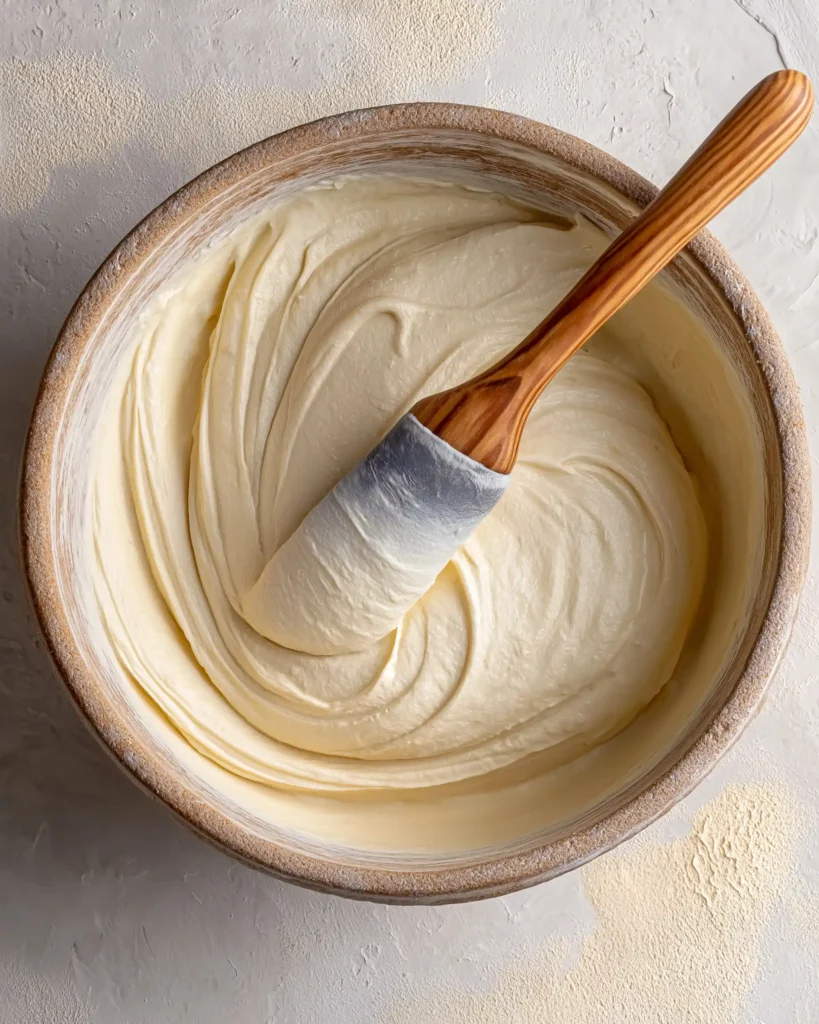
This creamy cheese frosting gently wraps around the red velvet cheesecake, bringing all the delicious layers into perfect harmony.
- In a large bowl, beat the butter until it’s fluffy and pale.
- Slowly add in the powdered sugar, a cup at a time, mixing on low to avoid the sugar cloud of doom.
- Add the vanilla extract and a pinch of salt.
- Toss in the cold cream cheese pieces one at a time, beating until smooth. You want it thick but spreadable.
- If it feels a little soft, pop it in the fridge for 15 minutes before frosting.
4. Assemble the Cake
Now the fun part—stacking and swooning.
- If the tops of your red velvet cakes have puffed up, carefully trim them to make each layer flat and even.
- Place one red velvet layer on your serving plate.
- Carefully lift the cold cheesecake out of the springform pan and slowly take off the parchment paper.
- Carefully place the Red Velvet Cheesecake layer on top of the first cake layer.
- Top it with the second red velvet cake layer.
- Use your offset spatula to frost the top and sides with cream cheese frosting. Smooth it out or go for rustic swirls—it’s delicious either way.
Optional: If you want to dress it up a bit, sprinkle some cake crumbs, add chocolate shavings, or top it with a few berries.
5. Chill Before Serving
Let your masterpiece chill in the fridge for at least an hour before slicing. It helps the layers settle and makes slicing cleaner.
Cooking Tips
- Use room temperature ingredients for both the cake and cheesecake layers. It makes a world of difference in how everything mixes.
- Cold cream cheese for frosting? Yep! It gives your frosting structure without having to overbeat it into soup.
- Measure your flour properly. Fluff it, spoon it into your cup, and level it off—no scooping with the cup itself.
- Freeze the cheesecake layer for 30 minutes before stacking to make it easier to handle.
- If you overbake the Red Velvet Cheesecake, it may crack—but hey, frosting covers a multitude of sins.
- Make sure to combine the vinegar and baking soda — this little reaction is the secret to the red velvet’s soft crumb and subtle zing.
A Slice of My Story
I ended up making this red velvet cheesecake at the last minute when my sister asked for it as her birthday treat. I panicked, of course. Layered cake and cheesecake? Sounded like something only Pinterest pros could pull off. But once I broke it down step-by-step (with a few chocolate-fueled pep talks), it became surprisingly manageable.
Now, it’s become the official “birthday cake” in our family. Even my picky-eater nephew asks for seconds—after inspecting every bite like a food critic, of course. That’s when I knew this recipe wasn’t just a one-time wonder. It’s a keeper.
Storage Tips for Your Red Velvet Cheesecake
Seriously, if you have any leftovers, you deserve a medal for your willpower. But whether you’re prepping in advance or savoring leftovers slowly, here’s how to store your red velvet cheesecake like a pro:
1. Refrigeration is a Must
After serving, cover any remaining cake with plastic wrap or store it in an airtight container. It’ll keep beautifully in the fridge for up to 5 days—if it lasts that long.
2. Save Some for Later
Thinking about freezing it? Absolutely! Wrap each piece tightly in plastic wrap, add a layer of foil, and place them in a freezer-safe bag. This way, you can defrost just the right amount whenever a craving hits (you’ll be so glad you did!). It stays fresh in the freezer for up to two months.
Tip: For the best flavor and texture, transfer the slices to the fridge the night before and let them thaw slowly.
3. Easy Trick for Perfect Slices
For clean, beautiful cuts, use a sharp knife warmed in hot water, wiping it between slices. This small extra step makes each piece look like it came straight from a bakery!
4. Avoid Room Temperature Storage
This cake isn’t the kind you can just leave sitting out—it needs a little extra care. Leave it out for more than 2 hours, and you’re venturing into risky territory, especially with cream cheese involved.
Nutrition Breakdown: What’s in a Slice? (Approximate Values per Serving)
Red velvet cheesecake is indulgent—but also a source of comfort, joy, and the occasional surprise “YUM!” Here’s a breakdown of what each slice is serving up. Think of it as your cheat sheet for mindful enjoyment:
While it’s not a “light” dessert by any means, it does pack in some valuable nutrients—calcium from the cream cheese and a little protein to balance out the sugar rush. Of course, moderation is key. One slice (about 1/12th of the cake) is plenty rich to satisfy your sweet tooth.
And let’s not forget—dessert is about joy, not just numbers. So go ahead and enjoy your slice without guilt, knowing exactly what’s in it.
| Nutrient | Amount per Serving |
|---|---|
| Serving Size | 1 slice (approx. 180g) |
| Calories | 580 kcal |
| Total Fat | 36 g |
| Saturated Fat | 21 g |
| Unsaturated Fat | 11 g |
| Trans Fat | 0.5 g |
| Cholesterol | 120 mg |
| Sodium | 360 mg |
| Total Carbohydrates | 55 g |
| Dietary Fiber | 1 g |
| Total Sugars | 44 g |
| Added Sugars | 42 g |
| Protein | 7 g |
| Calcium | 140 mg (11% DV) |
| Iron | 1.3 mg (7% DV) |
| Potassium | 160 mg (5% DV) |
| Vitamin A | 18% DV |
| Vitamin D | 4% DV |
Note: These values are approximate and may vary based on brands used and serving size.
Cooking Time & Recipe Yield
When you’re planning to make something as showstopping as red velvet cheesecake, timing is everything. But don’t worry—it’s more “bake and chill” than “rush and stress.” Here’s the full breakdown so you can schedule your sweet success like a pro:
| Prep Time | 40 minutes |
|---|---|
| Cook Time | 1 hour 10 mins |
| Chilling Time | At least 4 hours (overnight is even better!) |
| Assembly & Frosting Time | 30 minutes |
| Total Time | About 6 hours 20 minutes (includes chill time) |
Note: Most of this is hands-off time while the cake chills—perfect for multitasking, or let’s be honest, binge-watching your favorite show.
Yield
| Servings | 12 generous slices (or more if you’re sharing with light eaters) |
Planning a party or holiday feast? You might want to make extra and grab a bigger cake board—this dessert never lasts long!
Cuisine
| Cuisine Type | American |
This layered wonder is a proud creation of classic American baking—a dessert that blends southern red velvet roots with creamy New York-style cheesecake flair. It’s comfort food dressed to impress!
And just like that, you’ve got yourself a dessert that delivers on both flavor and flair. This red velvet cheesecake isn’t just a recipe—it’s a sweet escape, a little edible celebration that fits into your busy life without demanding too much from it. Whether you’re baking it for a birthday, a family dinner, or just because a Tuesday needed something special, it never fails to impress.
Each bite, from the soft red cake to the rich cheesecake and fluffy frosting, makes every moment of eating it pure happiness. And the best part? You made it. From scratch. In your kitchen. With maybe a little flour in your hair and frosting on your fingers (which, let’s be honest, is part of the fun).
So next time you’re wondering what dessert can wow a crowd and earn you bragging rights, remember this red velvet cheesecake. It’s not just a treat—it’s a memory in the making. And yes, you deserve that second slice.
Frequently Asked Questions
Do I need a springform pan for the Red Velvet Cheesecake layer?
It’s highly recommended. A springform pan makes it super easy to remove the Red Velvet Cheesecake without any cracks or mess. If you don’t have one, line a deep cake pan with parchment, leaving overhang to lift it out gently.
Can I freeze the whole red velvet cheesecake?
Absolutely. Just wrap it well in plastic and foil, then freeze for up to 2 months. Thaw overnight in the fridge before serving.
Can I use gel food coloring for the Red Velvet Cheesecake recipe instead of liquid?
You can! Just make sure to use a little less since gel is more concentrated. You may need to thin it out slightly with water to get that signature red velvet color.
